
One of the novelties that Windows 10 brought with it was the ease of sharing files with other users. Now, with the release of the new version of Microsoft's operating system, this feature has received even more enhancements. In this way, share folder Windows 11 it's easier, faster and safer than ever.
When sharing a folder, all users of our network will have unrestricted access to your files. With a shared location path, any authorized user can access that folder. Windows 11 will not prompt you for passwords or logins.
In addition to unrestricted access, these users will also be able to create files or new folders within that same folder and even delete or modify the files stored in it. If our computer is part of a network, access from any other computer connected to it. This turns out very practical in certain professional fields, in which it is necessary to share files and folders with other colleagues in the same office. Always in a safe way, of course.
This is only one of the many functions that the new version of the system incorporates. To know all of them we encourage you to read our post Windows 10 vs Windows 11: main differences.
How to create a shared folder in Windows 11
Although it is possible to share any folder on a computer using Windows 11, it is best to create a separate folder with the specific purpose of being shared. If you haven't done it yet, you can do it by following these steps:
- Step 1: We open the existing drive or folder in which we want to create a folder to share.
- Step 2: We click on "New" on the toolbar of the File Browser. Then we select the option "File" in the drop-down menu.
- Step 3: We rename the new folder created. "Shared folder" might be an appropriate name.
Once the new folder is created, let's see what methods we have to share it. In Windows 11 there are several ways to share files with other users and contacts. For example, File Explorer, OneDrive and email can be used. Let's see how each of these modes works:
Share folder using OneDrive
Share folder using OneDrive
OneDrive is Microsoft's cloud storage service. Its basic features are offered free of charge, without compromising security. This means that its use is not only practical and safe, but also absolutely recommended.
Speaking of the topic this post is focusing on (sharing a folder in Windows 11), OneDrive is a good option. It will help us share any kind of files safely with people who are not directly connected to our home network. Or to our office or workplace. In addition, the user who will access our folder can be located anywhere in the world. The cloud makes great distances mean nothing.
How to share a folder with OneDrive? The process is very simple. All you have to do is move the folder in question to your OneDrive storage and share it from there. This is how we should proceed:
- We go to the location where the folder or file that we want to share is located.
- We click with the right button. In the menu that appears, we select the option "Move to OneDrive".
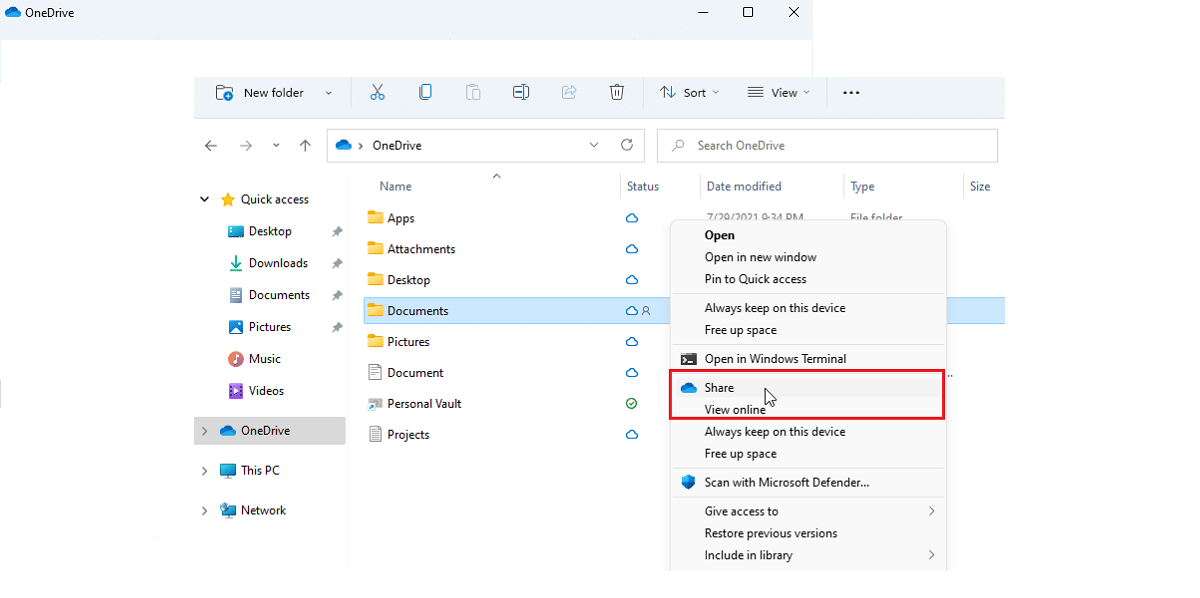
Another quick and easy way doing so is as shown in the image above:
- First select OneDrive in the main menu that appears on the left.
- Then right-click on the folder or file to share and select «Show more options».
- There the option will appear "Share", in which we can also introduce certain requirements to increase security when sharing information. For example, the use of a certain password may be required.
Share folder in Windows 11 via email
Share folder in Windows 11 via email
Another simple and fast method. The only requirement is that we have an email application installed on our desktop. With this, the process could not be easier:
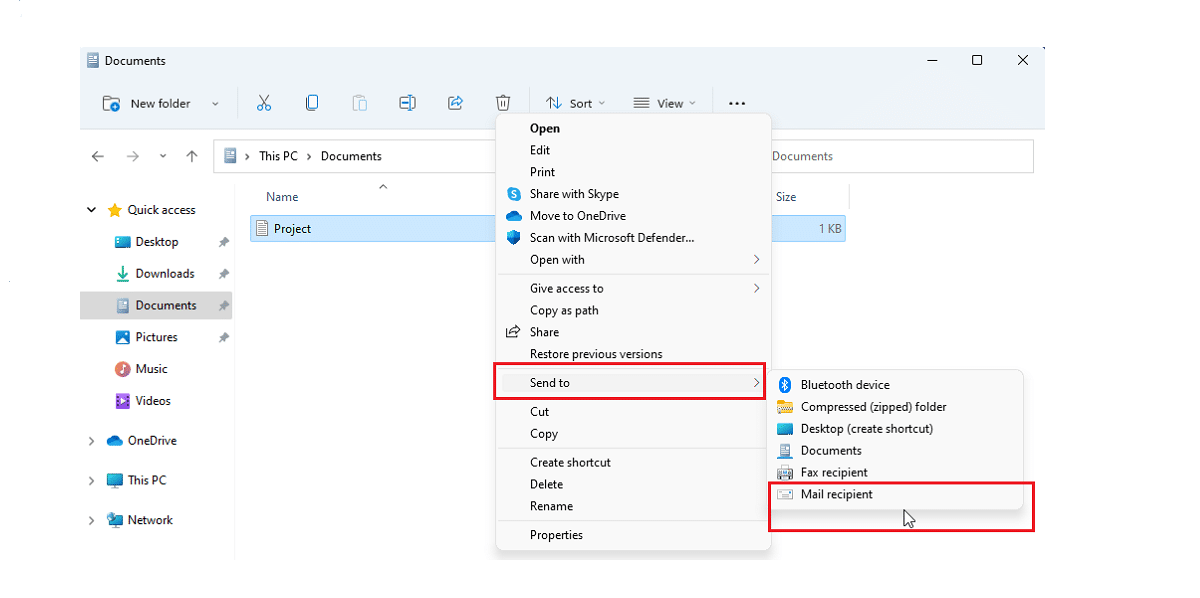
- First we access the location where the folder or file that we are going to share is located.
- Then we right-click. In the menu that appears, select "More options".
- In the following menu, we simply choose the one of "Send to…" and enter the recipient's email address.
Share files over the network
Share files and folders on a network in Windows 11
The most frequent use of shared files and folders is probably between coworkers or members of the same company. In these cases it is usual for all of them to be connected to the same network, which makes the task of sharing information much easier.
As in the previous method, email plays a prominent role here as well. The steps to follow would be these:
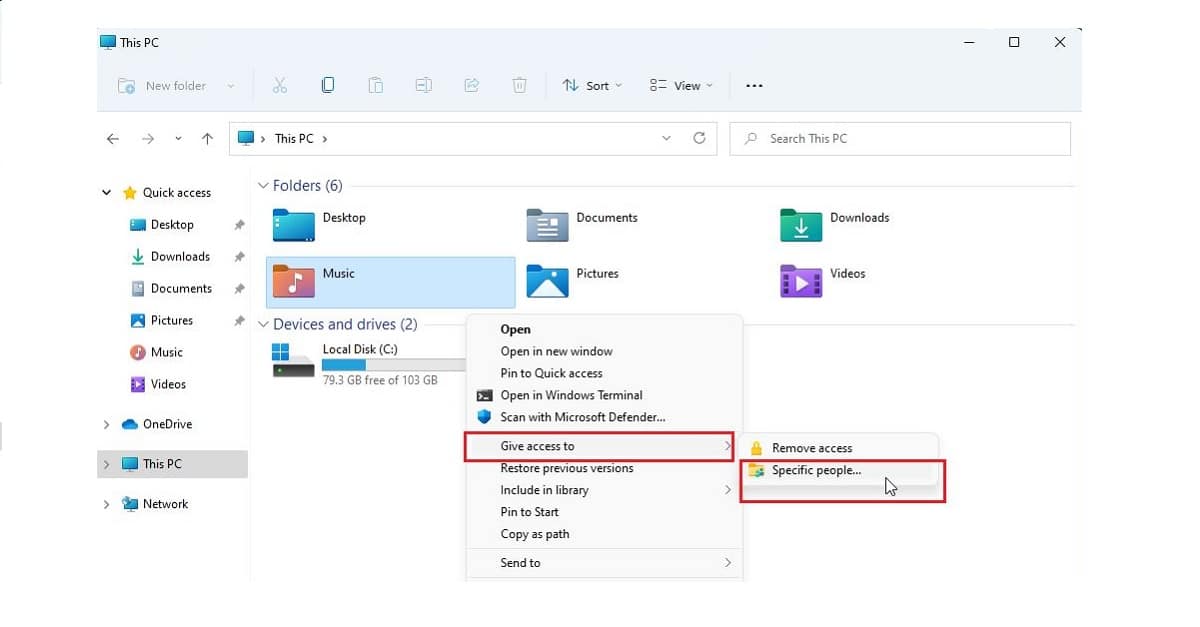
- First of all, we right-click on the file or folder that we are going to share.
- In the menu that opens, we select «Show more options», where we will find the option of "Give access to ...". There we will select Specific people.
- Next, a space opens in which to enter the email addresses of the people with whom we want to share the file. This process must be carried out manually, adding the emails one by one and then pressing the button "Add" and finally that of "Share".
Share using an external application
One last method that we must comment on is the possibility of sharing folder in Windows 11 through an application. To do this, you must use the specific option «Share with the application». The question is: What application should be used? The answer is easy: it depends on the type of file that we are going to share.
When in doubt, it is best to search and download one of the applications available at Microsoft Store specially designed for file sharing. The advantage of this method is saving time, because using one of these applications will save us a few clicks.