
Surely, on more than one occasion, you have seen yourself with the need to make a screenshot to document a job, save an image, keep a crop… Both Windows and macOS allow us to take screenshots natively.
However Where are screenshots saved? Can I change the path where to save? We answer all these questions in this article.
How to take screenshots in Windows
Windows puts at our disposal 5 different methods for take screenshots. At first they may seem like a lot, however, this high number allows users to choose the method that best suits their way of working.
Snip Tool
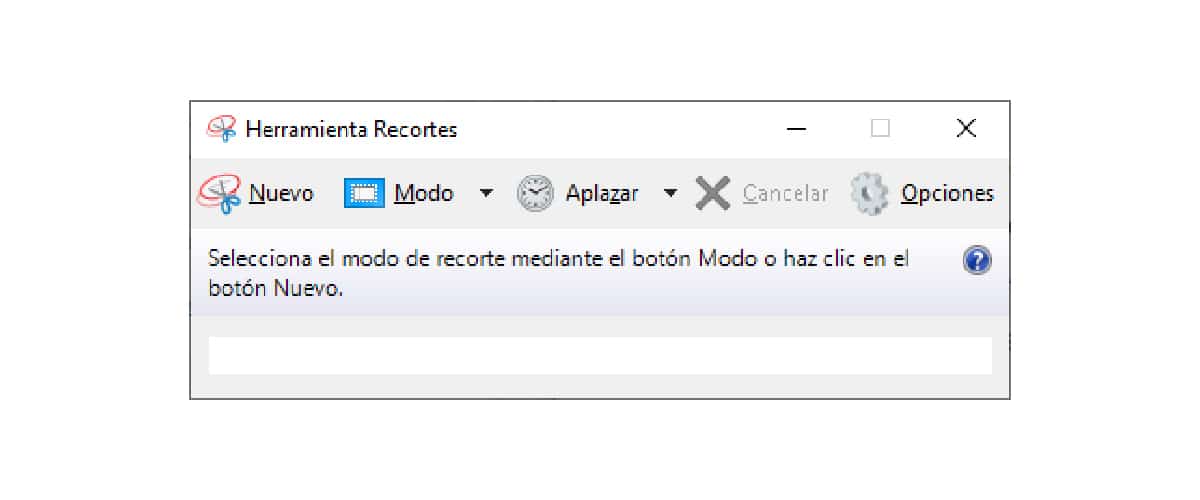
The clippings app has been with us for many years on Windows. At the moment, it seems that Microsoft keep trusting this app for the great versatility it offers us.
In addition, it is the only method of all those that we show you in this article, which allows you to schedule a capture.
Application Snipping Tool It's inside the Windows menu, though you can quickly get to it by typing the word Clippings into the Windows search box.
This tool offers us 4 different methods to take screenshots on Windows:
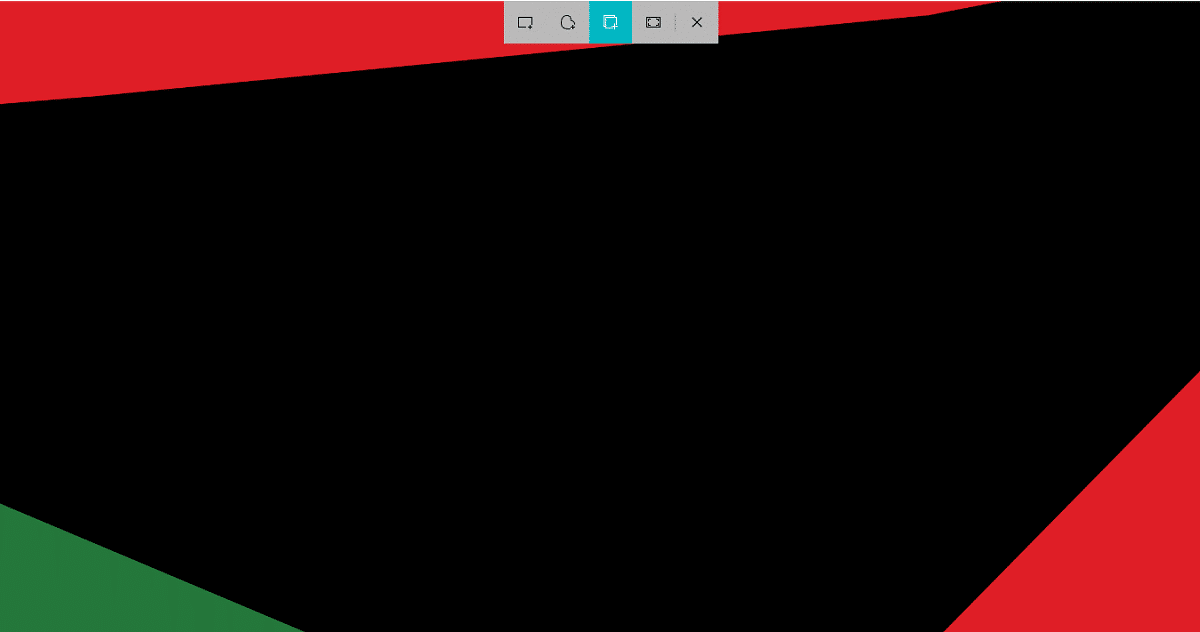
Free form clipping mode
Freeform cropping mode allows us to cut out silhouettes of objects that we want to save on our computer.
Rectangular Crop Mode
As its name indicates, with this option we can perform rectangular shaped cutouts.
window cropping mode
This option is ideal for take a screenshot of an application specifically, from the active Windows window.
Full screen cutout mode
The full screen cutout mode allows us to take a screenshot of the entire screen. This mode, in combination with the function Postpone, sets a delay of up to 5 seconds when taking a screenshot.
Windows key + s
This keyboard shortcut allows us to perform the same four methods than the Clippings app, but without the possibility to delay the capture time, but with the same options.
- Rectangular Crop Mode
- Free form clipping mode
- Crop mode active window
- Full screen cutout mode
Print Screen key

By clicking on this key, located on the right side of the keyboard, Windows will take a screenshot to our team's clipboard.
In order to work with her, we must paste it into an app like Paint and save the file. But, if we want to make several captures and paste them directly into a document, we must first activate the Clipboard history.
For turn on clipboard history We must follow the steps that I show you below:
- We access the Windows configuration options
- Next, click on System - Clipboard and activate the switch Clipboard history.
Thanks to the Clipboard History, we can press the Telca ImpScr key combination as many times as we want, since all captures will be stored in clipboard history and we will be able to paste them in the order we want by pressing the keys Windows + V, which gives us access to this history.
Alt + Print Screen

This combination of keys perform a active window capture, that is, of the window with which we are working at that moment.
this screenshot is stored in the clipboard so we must use Paint to create an image file of it.
Windows key + Print Screen
With this combination of keys, we can take screenshots that will be automatically saved on our computer, without having to paste them later in any application.
Where are screenshots saved in Windows?
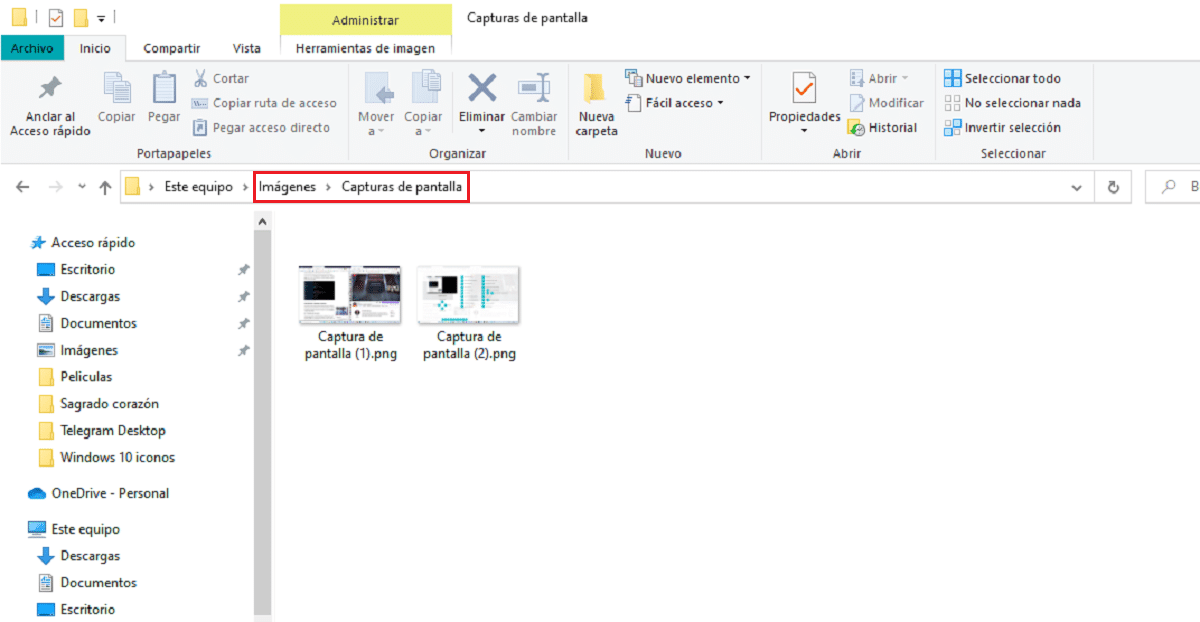
The only method of the 5 that I have shown you above to take screenshots that stores the image in a file, is through the keys Windows + Print Screen
Pressing both keys together will create a file in .JPG format in the folder Images – Captureas of screen of our team.
How to change the folder where screenshots are saved in Windows
To change the default folder, where all the screenshots are stored, we must perform the steps that I show you below:

- First of all, we go to the folder Images.
- Next, we select the folder Screenshots, right-click and select Properties.
- Next, click on the tab Location.
- To change the directory where they are stored, click on search destination and select the new directory where we want the screenshots to be saved.
- If we want to move the existing captures, instead of clicking on Find destination, we will click on MOVER.
How to change the format of screenshots in Windows
Windows does not allow us to modify the format in which the screenshots that we make with the command Windows Key + Print Screen are saved.
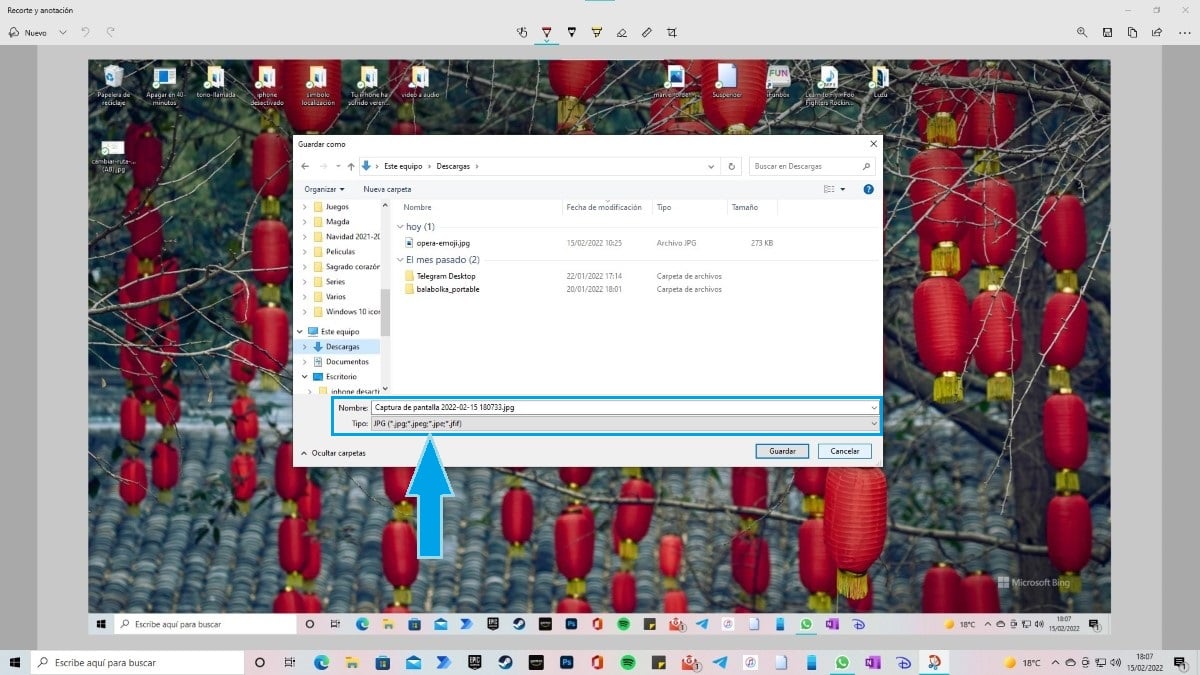
However, when we use the Snipping Tool or when we use the command Windows Key + Shift + S, when saving the file on the computer, if we can select In what format do we want to save them?
How to take screenshots on macOS
Unlike Windows, the Mac operating system only offers us 2 methods to take screenshots. With these two methods, we can do 4 types of screenshots:
all screen
To take a screenshot of the entire screen of our Mac and the monitors that we have connected, we must press the key combination CMD + Shift + 3.
When you play the camera shutter sound, the system confirms that the capture was successful.
Of the active application with shaded border
If we want to take a screenshot of the active window or application and add a shadow to it, we will proceed by pressing the key combination CMD + Shift + 4.
Next, we move the mouse to the window we want to capture, press the space bar and then click with the left mouse button to confirm the capture.
will play the sound of a shutter.
Of the active application without border
If we do not want to add a shadow to the active application capture, we must carry out the same steps as in the previous section, but without pressing the space bar. CMD + Shift + 4.
Capture a part of the screen
To capture only a rectangular area of the screen, we will use the keys CMD + Shift + 3. Next, we will delimit with the mouse the area that we want to capture.
Where are screenshots saved in macOS
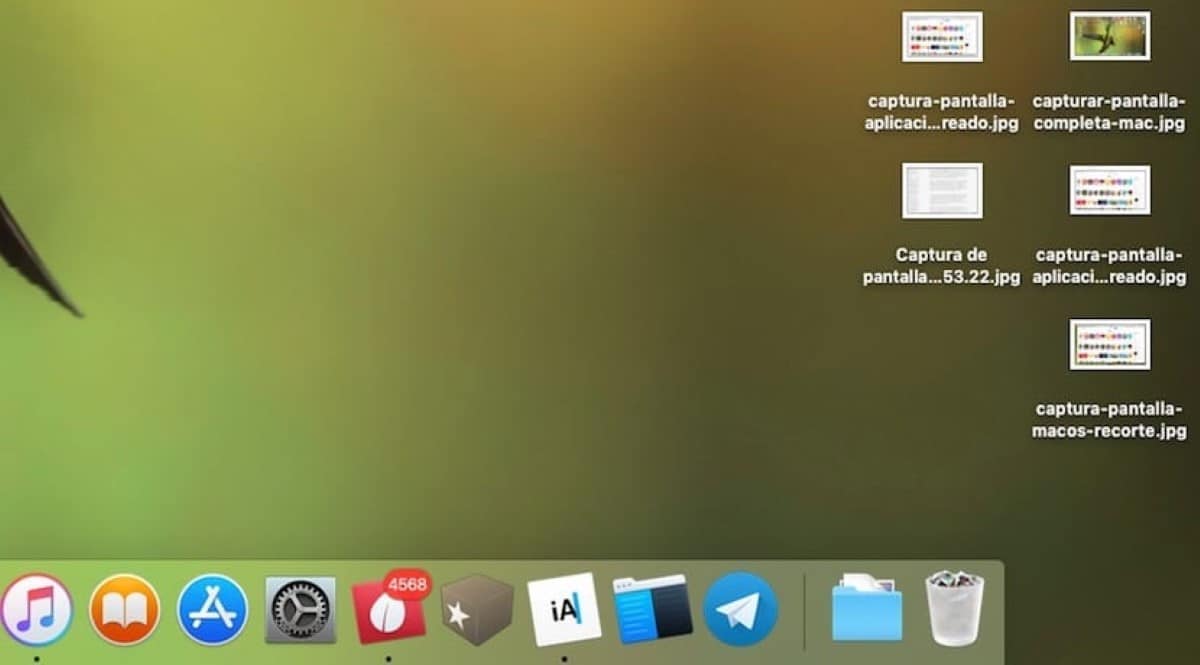
All the screenshots that we take on a Mac, using the native method, are stored on the desktop of our computer by default in .PNG format.
How to change the folder where screenshots are saved in macOS
However, we can change the path where they store, performing the steps shown below:
- First of all, we must open the application Port, application found in the Applications Launchad.
- Next, we need to copy and paste the following text
- defaults write com. apple. screencapture location ~/new-location
- If we don't know the path of the New location, we leave that part blank and drag the folder where we want to store the captures to the Terminal application so that it recognizes it and enters the exact directory.
If we want the screenshots put back on the desktop, we must enter the following command through Terminal:
- defaults write com.apple.screencapture location ~ / Desktop
How to change the format of screenshots in macOS
If we want use .JPG format instead of .PNG that uses macOS natively when taking screenshots, we must access the Terminal application and write the following command:
- defaults write com.apple.screencapture type jpg