
A vital element to achieve sales is the location, by which your potential customers locate and specify you. On this occasion, we will dedicate this article to how to change location on wallapop.
This company founded in 2013, offers all its clients, through the web, the opportunity to buy and sell various products through the internet. If you want to know how to add another location to your store, you should read this note.
Tutorial to change the location in Wallapop from different devices

In this step-by-step tutorial, we will explain what you must do from your mobile or from your computer to change location on wallapop.
Step by step of how to change the location in Wallapop from your computer
Next, we will discuss the steps to follow to place a different location than the one you had previously configured on the Wallapop platform. This process will be very simple for you, just follow the order shown.
- Accesses site of Wallapop and log in with your credentials.

- In the upper right area of the screen, locate the icon with your photograph, this will allow you to enter your profile. We'll click on it and wait for it to load a new screen.

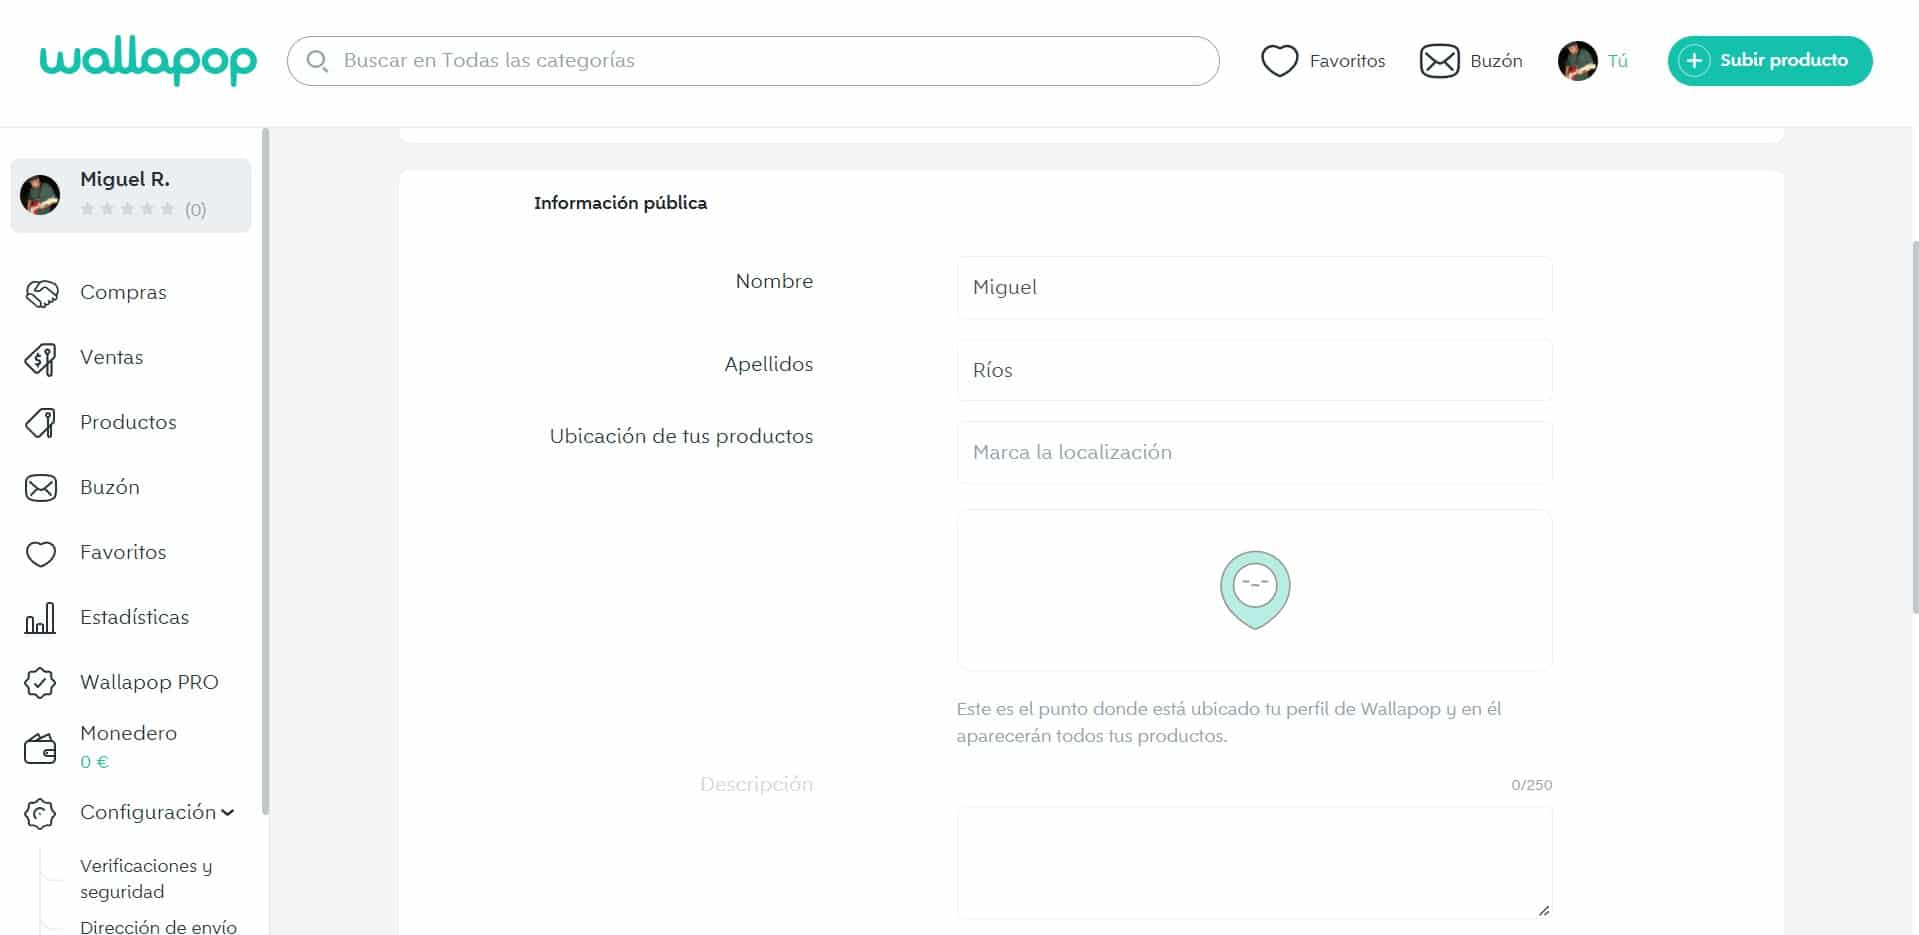
- Within your profile, on the left side of the screen you will see a series of options, here you must search for your name, which will be expressed in the first option. We will click on this option.

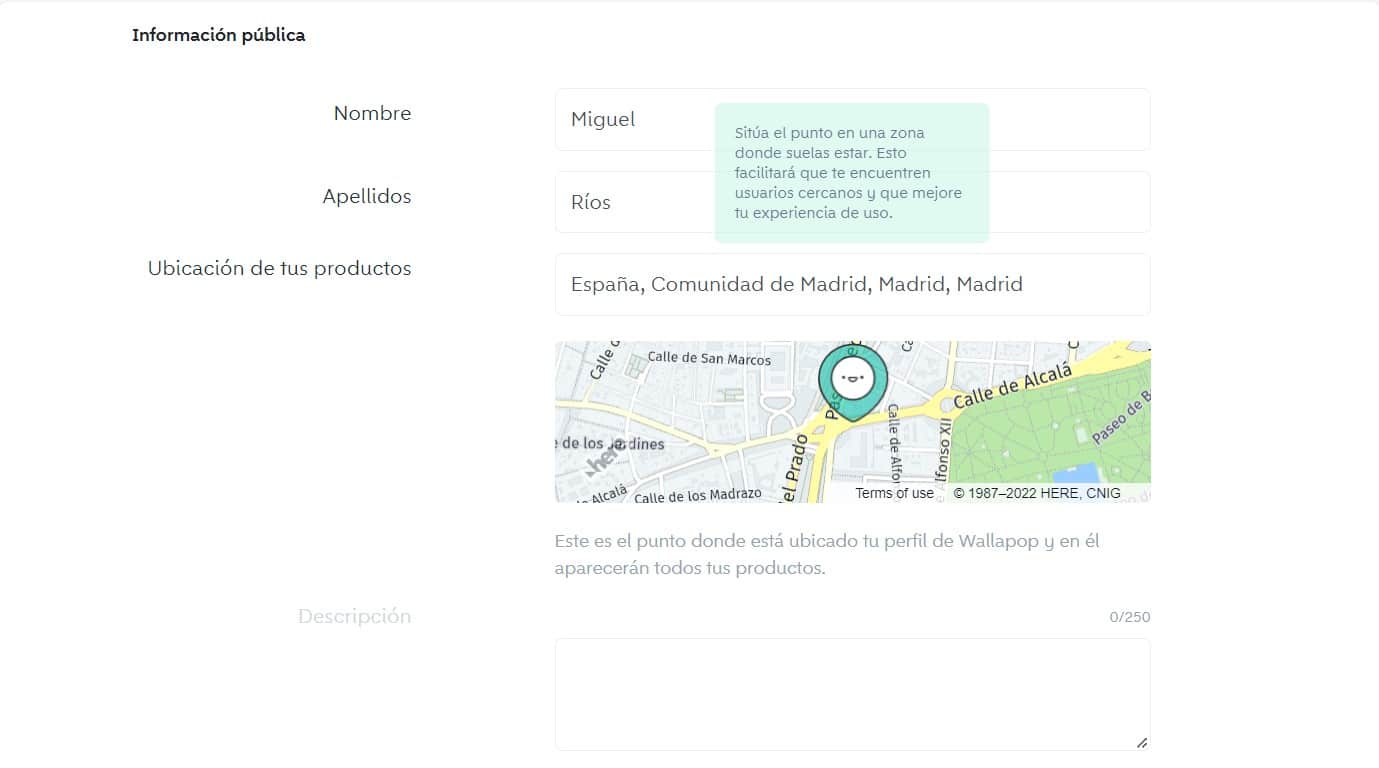
- In the first tab, which opens by default, “Profile”, we will find information about our store, which is recommended to keep updated.
- We will scroll a little down the screen and it will appear “Public information”, element that interests us at this time.

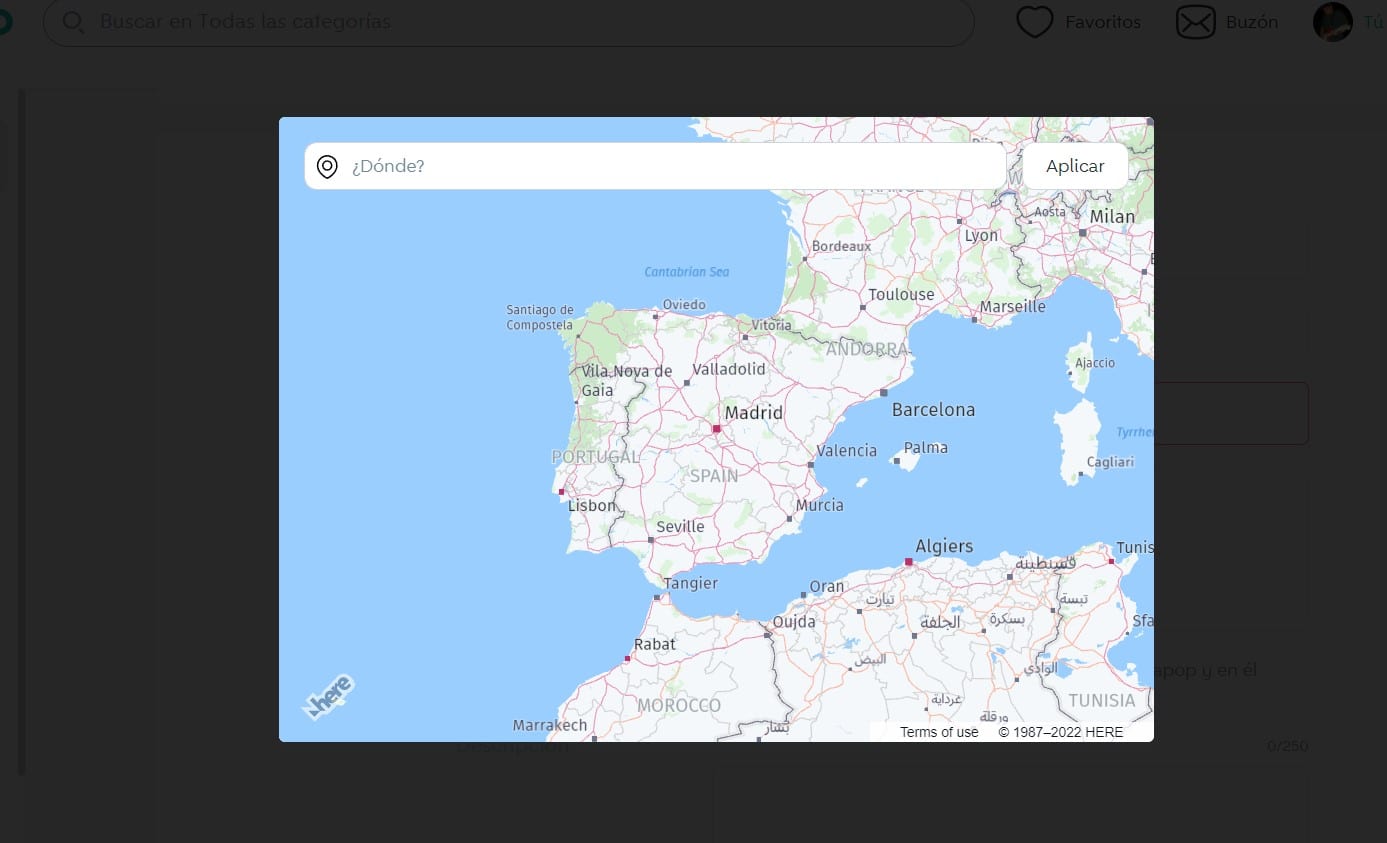
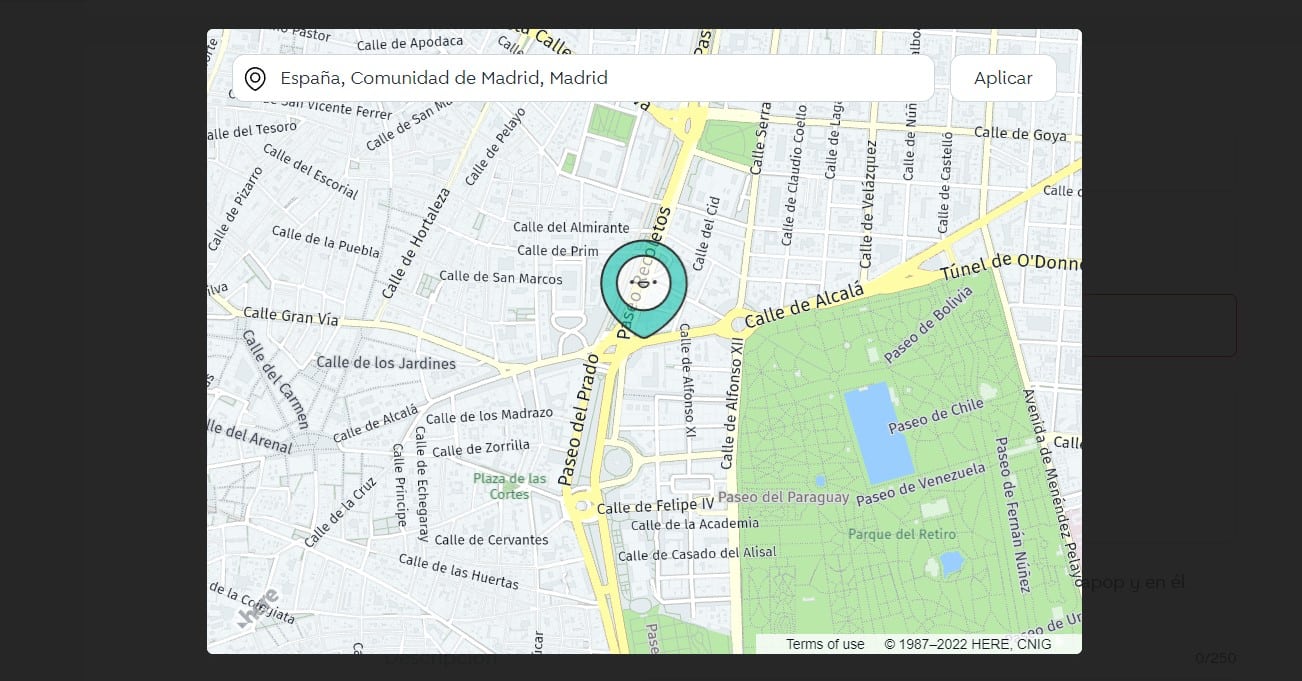
- Let's click on the box "Location of your products”, which will display a pop-up window to easily georeference your location.

- We will find a four of text where to place our address of sale of the products, the more detailed it is, the easier the procedure will be.

- Once we see our location on the map, we will click on the “Apply”, in the upper right area, next to the address.
- To confirm that the process was successful, when you close the pop-up window, the window you had previously will appear, but this time we will be able to see a segment of the previously confirmed map.

- Further down we will find the specific address of the store, where we will repeat the previous process, but in the section “Store Address”. For this it is necessary to have the account verified and have a subscription plan.
- At the end, we must go down to the bottom of the screen and click on the green button “Save".
- A pop-up message will appear in the upper right corner, indicating that the changes were successfully saved.


This process is very simple, fast and direct, but very important to achieve success in your sales within Wallapop.

Step by step of how to change the location in Wallapop from your mobile device

The above steps will be very similar to what we will do for change location on wallapop from your computer, but in case you have any questions, we will leave a sequence to follow.
- Download and install the Wallapop mobile application, it is available in the main download stores.
- Log in as usual, using your credentials.
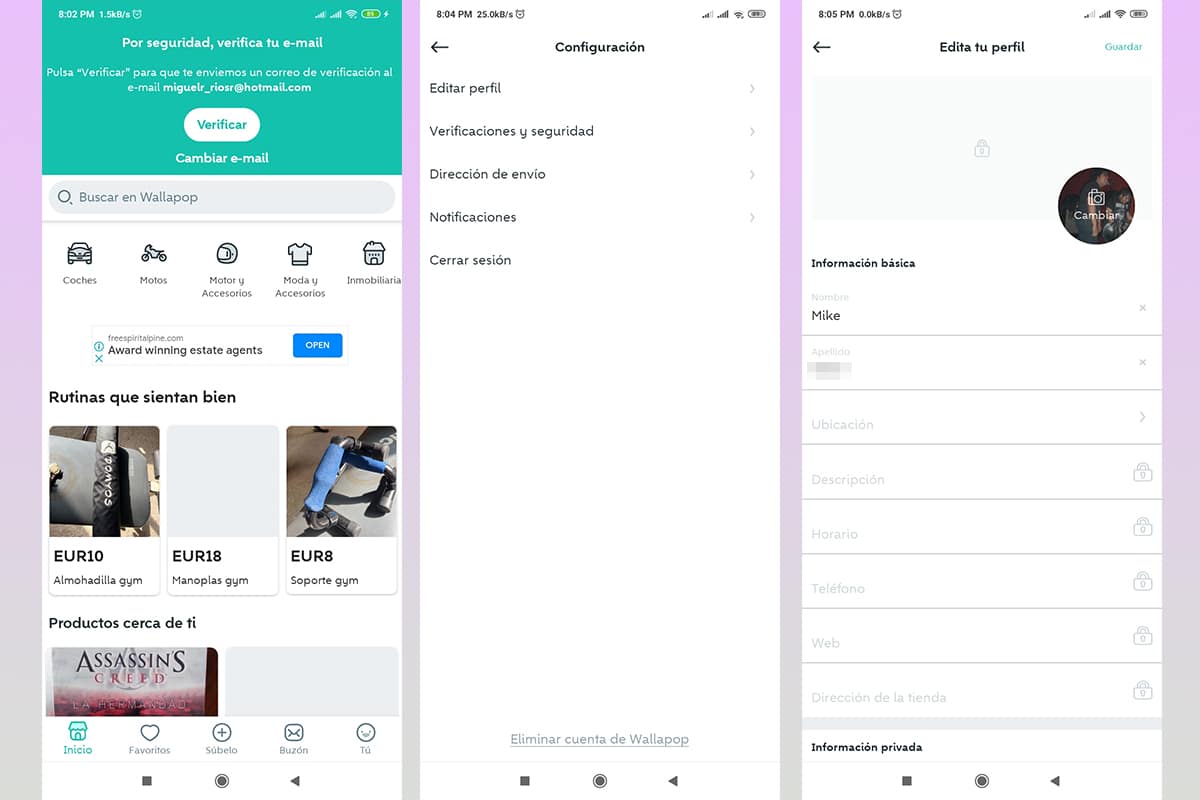
- On the main screen, locate in the lower right corner the icon called “Tu” and click on it.
- In your profile, look for the option called “Configuration”, which will allow you to change various elements. We click.
- The first option, "Edit profile”, will be the one that we will press gently to access.

- Your basic information will appear on the new screen, but this time we will go to “Location".
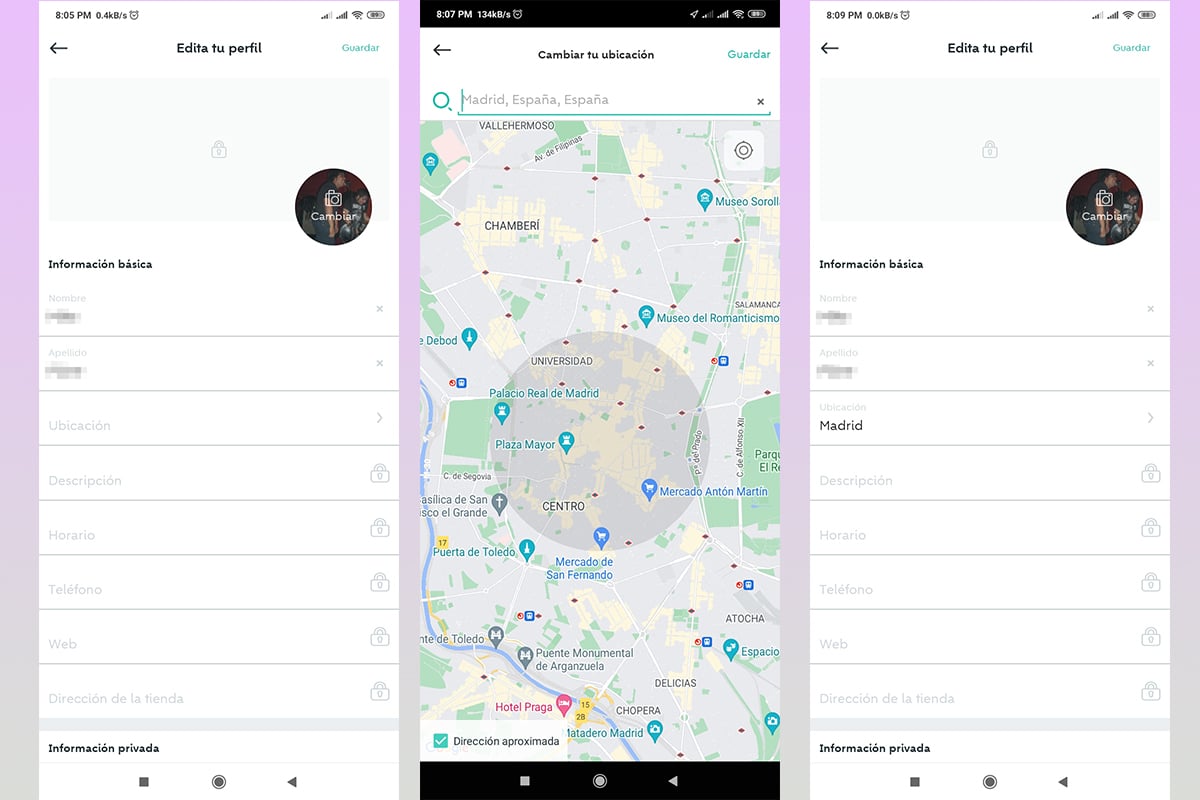
- Clicking this option will bring up a map and a search bar at the top. It is important that you put your address in detail, this will help the system.
- In case you do not want to give your exact location, but a reference, we can leave the option “approximate address”, which you can see at the bottom of the screen.
- When we have the location ready, we click on the “Save”, located in the upper right corner of the screen.
- The way to guarantee that the process goes well is through the written address that will appear under the location, it was empty a few minutes ago.
- We scroll down a bit and click on “Store Address”, where we will repeat the previous process, but defining where our point of sale is located.
- To access this, it is necessary that the account has been verified and purchased a subscription plan, otherwise a small padlock will appear, indicating that we cannot edit this option.
- At the end of editing the content, press “Save”, a small button that you will find in the upper right corner of your screen.
As you can see, this procedure is similar to the one carried out on the computer, easy, fast and safe.