In Windows 10 we have installed by default a series of folders on the local disk of our computer: My documents, My music, My videos, My images ... If we want move and change these folders to another drive, we must follow the steps that we will mention below.
In this post we will show you how to move the Documents folder, as it is the one we usually use the most. Thus, if we change this folder to another unit, we can make the hard disk run only Windows 10 Operating System y do not accumulate files that we do not use.

The Documents folder is a component of the user profile that is used to store the personal data of each user in the system. So, by default, Windows 10 saves documents in this folder.
Thus, each user account of Windows 10 operating systems has a set of default folders that allows you to save and organize images, videos, documents, downloads, music and other files separately from other accounts.
Often, these folders tend to agglutinate a large number of files on the local disk of our computer, so it is necessary move location where they are saved by default for start freeing up space. If we want the system not to automatically save the documents in this folder, we must follow these steps.
How to change and move the Windows 10 Documents folder
To change this folder, we must access the File Browser. This folder can be found anchored to the task bar of our computer or we access it through the Windows 10 search engine (located in the lower left part of the screen).
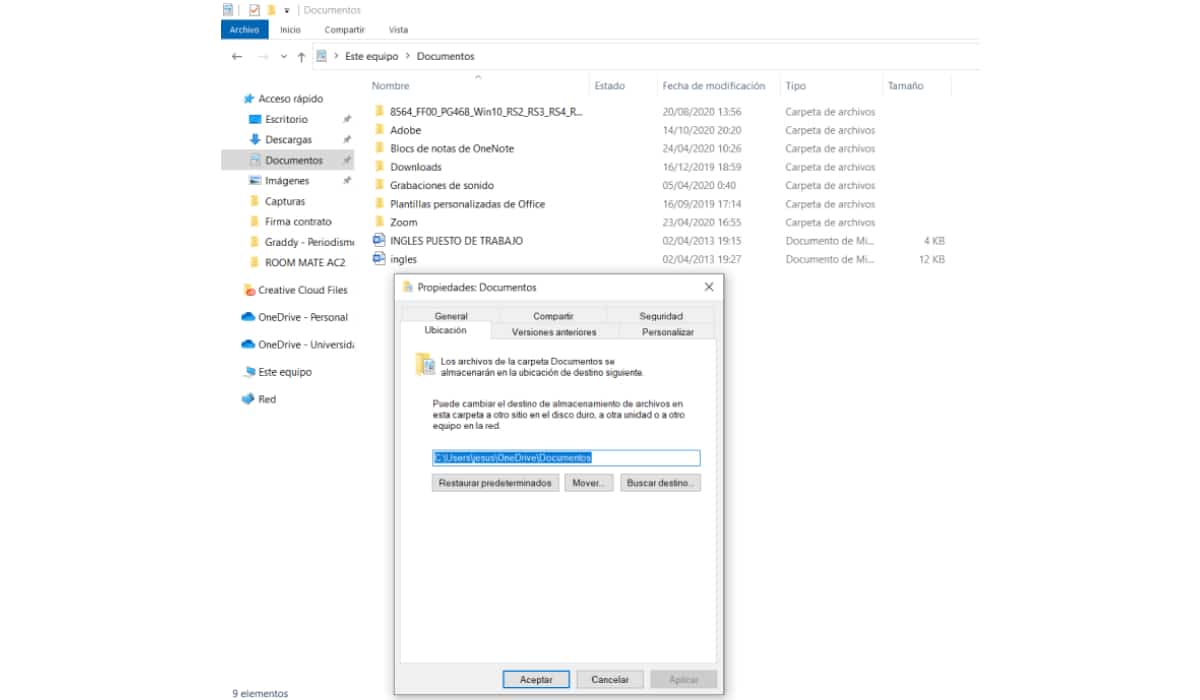
In the left side menu, we will see all the Windows 10 folders installed by default and anchored to the quick access:
- Desktop
- Downloads
- Documents
- Images
- Music
- Videos
- And so on
These folders can be changed location in Windows 10, we will focus on how to change the Documents location. To do this, we must follow the steps which we describe below.

Create destination folders to move Documents
In order to change the Windows 10 Documents user folder, we must first create a new destination folder. To do this, we will do the following:
- First and how most important, we must create a folder that will be the one that replaces the Documents folder.
- To do this, we access the folder File Browser.
- In the left sidebar, we right click and click on New and we create our folder.
- Once created, we right-click on the new folder and click on Properties
- Let's go to the tab Customize now and we select the folder class: General elements.
- We can also change the folder icon.
- We apply changes and accept.
Once the new folder is created, we must activate the relocation of the Documents folder.
Relocate the Documents folder
To modify the location of the user folder, we must do the following:
- We access the folder File Browser.
- Right click on the folder Documents and click on Properties
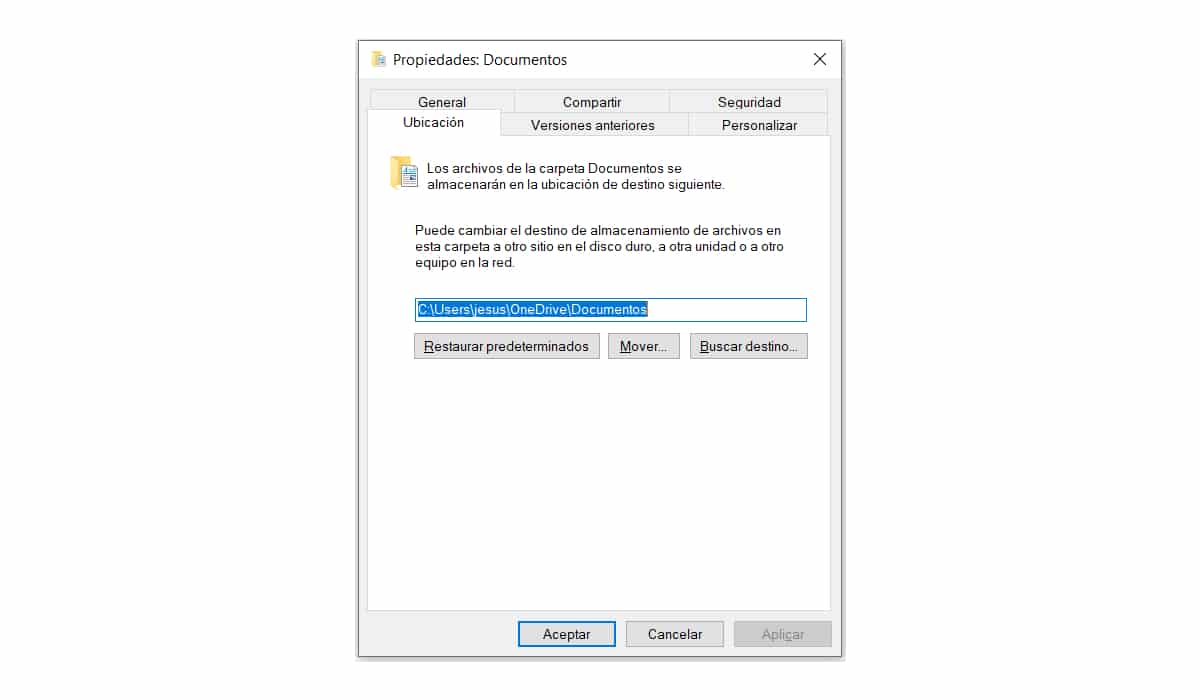
- Let's go to the Location.
- We will see that the location of the folder is on the local disk C :. Click on Move… to change it.
- select the folder we have created (It could be on another disk, for example the E :).
- We click on Apply.
- We will get a warning message. We click on Yes.
Then the files will begin to move that was in the previous folder to the new one that we have created. And voila, we have already changed the Documents folder in Windows 10.

Restore the default Documents path
A problem may arise when we relocate the Documents path on our system. It may be that we get an error or it is no longer available, so we must Restore Defaults to restore the path. To do this, we will do the following:
- We will have to access the original folder Documents and click on Properties.
- Let's go to the tab Location.
- We click on Restore defaults.
- We click on Apply and we accept the changes made.
Alternatives to changing the location of Documents
If we don't want to relocate the Documents folder but we do need to free up space on the local hard drive, there are other alternatives that are equally or more effective. Here we show you some:
- Use a external hard drive to store and save the files in the Documents folder. Thus, in the same way, we will also have a backup that will help us avoid the irrevocable loss of our personal documents.
- Use a USB to save the files we need.
- Let's go to the folder Documents original and select all the files inside. We right click and click on Cut.
- We enter the new folder located outside the local hard drive C: and right-click on Paste. We can also paste these files on a USB or external hard drive.
As we can see, it is very easy to change the Documents folder as well as any other folder from which Windows 10 automatically creates and saves your files. It is only necessary to follow a few simple steps to be able to carry it out.