
Would you like your work and documents to be well organized and easy to read? Something that can help you achieve this is to use a content index. Now, although it is true that we can create it manually, the process is slow and we are more likely to make mistakes. For that reason, In this article we will see how to insert an index in Word automatically.
An index basically has the function list the topics found in a document, as well as indicate the page number on which they appear. However, for this to work as expected, you'll need to format your document titles correctly. Let's discuss how you can use the tools in Word to create your own index.
How to insert an index in Word automatically?

To know how to insert a table of contents in Word automatically, you must first know some important factors. First of all, keep in mind that It is necessary to know how to organize the titles of your text. To do this, you must put the format you want to the titles that will appear in the index that you are going to create. In general, we can choose between putting Title 1 or Title 2.
In case you want all the headings to be the same, you can put Heading 1 to all of them. But, if you want your index to have a more attractive style and that the chapters are inside others, you can also add a Heading 2. This way, the heading 'Heading 2' will be inside the 'Heading 1' that precedes it. Once your headings are organized you can insert the index. How to do it? Let's see.
Steps to create an index automatically in Word
Next, let's look at the steps to follow to insert an index in Word. The first thing you should do is locate the ideal space in which you want the table with the contents to be inserted and click there. Once you have it selected, follow these steps:
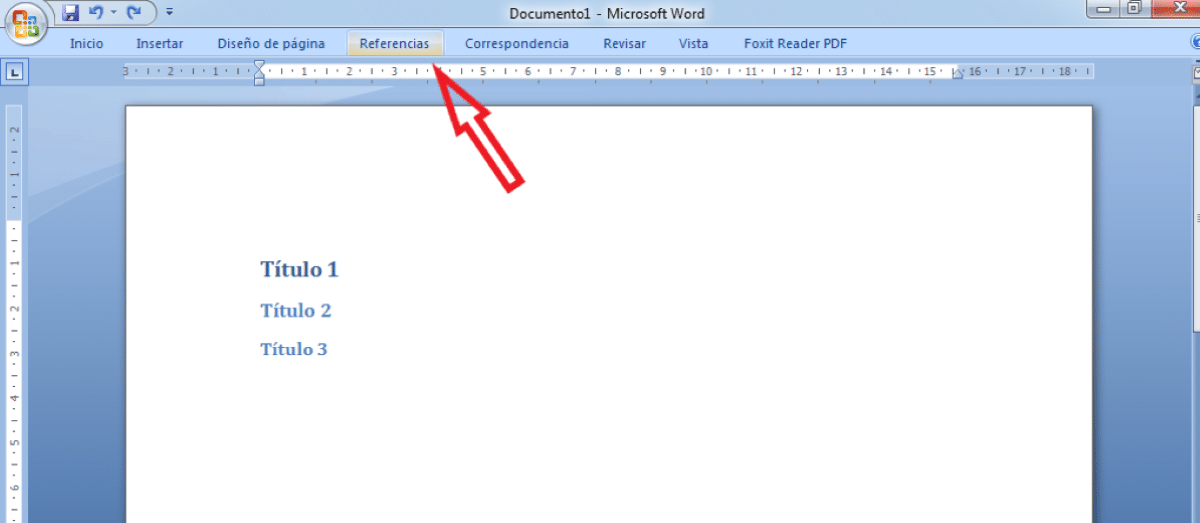
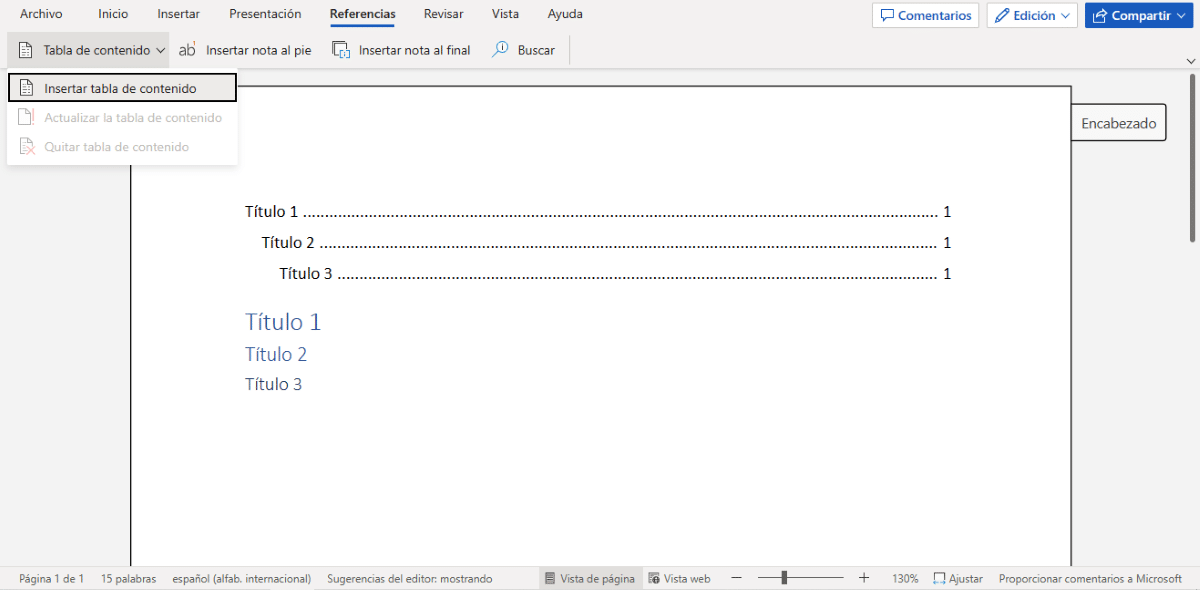
- Click on the 'References' entry that you will see at the top of Word.

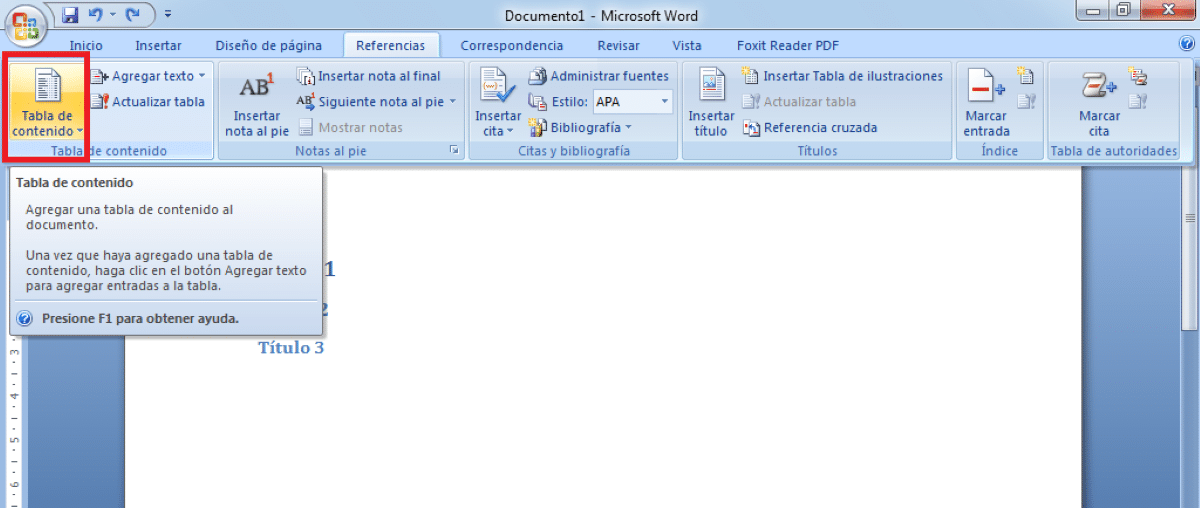
- On the left side of the toolbar, click 'Table of Contents' to bring up the menu.

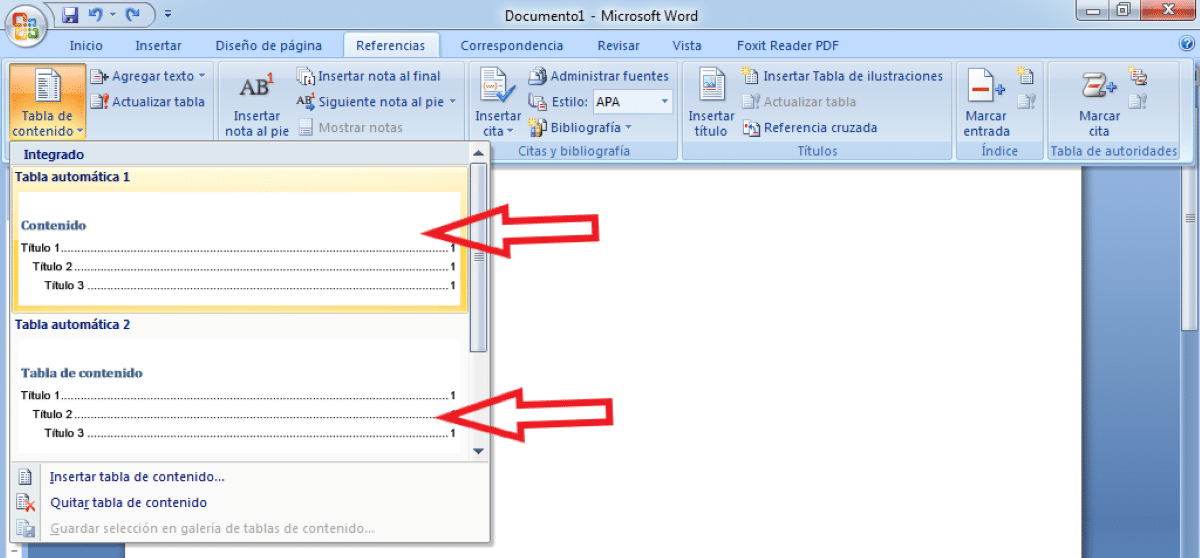
- Now choose the automatic table format you want to use.

- Once this is done, the table will be inserted automatically in the space you chose.

- Ready! You do not have to do anything else, because Word will use the titles that you previously assigned.

These steps will allow you to create a table of contents (index) automatically. Which means that Word will choose by default the design that the index will have. For example, you will see a default font and a series of dots to connect the titles with their respective page numbers.
How to customize the index in Word?
Now, it is true that the automatic index of Word offers adapts to most of the requirements. Nevertheless, in case you want to create a more custom table, the tool also offers this function. How can you take advantage of it? To do this, you must do the following:
- Click on the 'Table of Contents' entry.
- Now click on 'Custom Table of Contents' or 'Manual Table'.
- Make the changes you want.
- Ready! So you will have created a custom index.
What modifications can you make if you choose Custom Table of Contents? Remember that whatever the change, you will be able to see it at least twice in previews. Among the changes you can make to the index are:
- Change the style of the index: customize the style of the index according to your tastes. Some of the changes that you will be able to make are: adjusting the size and style of the font, the color and the format of the page numbers.
- Add text to your index: In case you want to add custom text to your table of contents, just click 'Insert' in the dialog.
- Add bullets, numbering, or change the font.
Something else that will help you take advantage of the Word index is to know how to use it to scroll through the text. For example, if you hold down the Control key while clicking on one of the table headings, you can jump directly to that section of text. This is an advantage, since it allows you to move more easily in a long text that you are editing.
How to update the index you have inserted?
On the other hand, keep in mind that the index inserted in Word is not updated automatically. This means that you will have to update it every time you add or modify the titles and headings of your text. So how can you update the index quickly? By completing these simple steps:
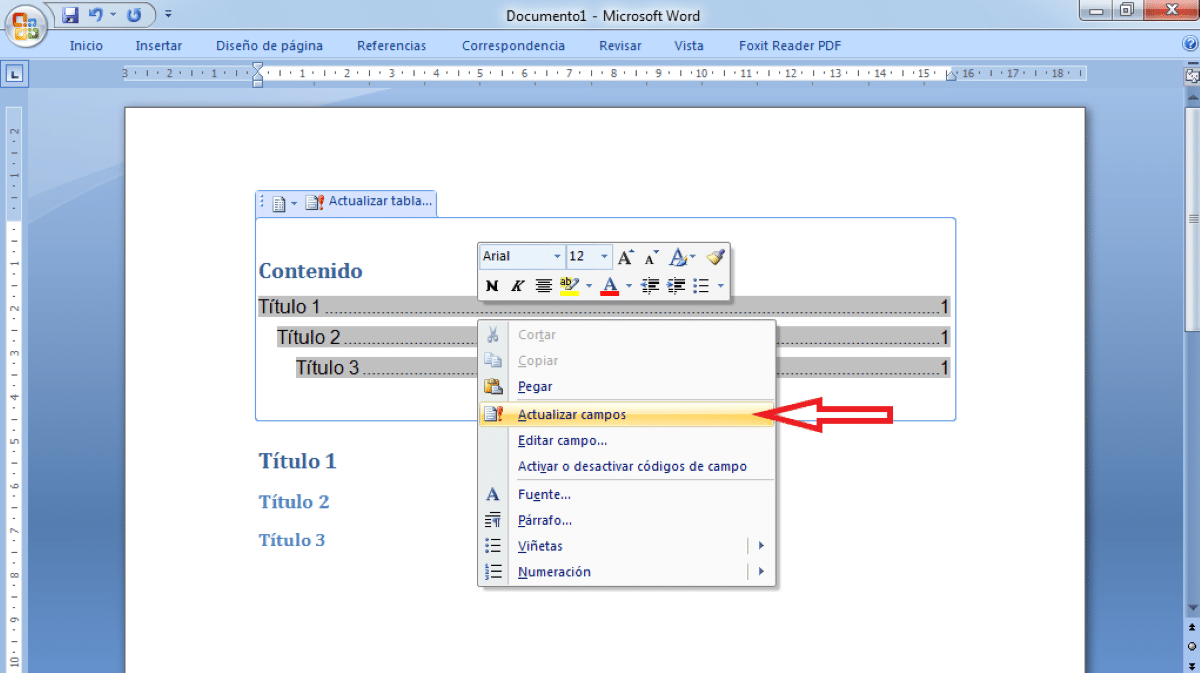
- Hover over the index and right click.
- Now, click on 'Update fields'.
- Then, click on the 'Update index' entry (you can update only the page numbers or the entire table).
- Ready! In this way you will have updated the inserted index.
How to generate an index in Office Online?
If you use the online version of Microsoft's text editor, the procedure for inserting an index is very similar to the one above. To do this, the first thing you must do is enter the editor and organize the headings of your texts with the format you want. You can select Heading 1, Heading 2, Heading 3 or whatever you want.
Once you've organized the headings, it's time to insert the table of contents that will allow you to sort and scroll through your text. In order to achieve this, follow these simple steps:
- Click on the 'References' entry at the top right of the tools.
- Now, click on the 'Table of Contents' option.
- Choose the table of contents style you want.
- Headers will be automatically detected and placed in place.
- Update the index as you make changes or add headers.
- Ready. So you will have inserted an index in Word Online.
As you can see, adding an index to your texts or documents in Word is not as complicated as it seems. You just have to know the location of the tools and how to take advantage of them. If you do, you will see how your texts will be better organized, which in turn will save you time and work.