
Microsoft Word is a tool that millions of people use every day, either for work or in their studies. The Microsoft document editor is a powerful tool, which gives us many options. It is even possible to make a plan using this software, something that many users do not know. Therefore, we show you how to make a plan in Word.
This way you will be able to see the options that this program gives us and the way in which this plan can be created. Although it is possible, it will not give us the same result as in professional software intended for this purpose. In any case, if you wanted to know how to make a plan in Word, we show you how this is going to be possible.
There may be people who need to do a floor plan design and cannot or want to use one of these specialized programs for it. In this type of situation you will be able to use Word as a tool with which to make such a design. In addition, it is a tool that fulfills well, so without being a professional design, it will fulfill what you needed at that time, which is also something of importance.
We are going to indicate the steps that have to be carried out in order to perform a 2D plan and 3D modeling. So you are going to know how to make a plan in Word. Ideal if you do not have or can use any of those special programs that exist for this type of functions.
How to make a plan in Word
Microsoft Word gives us a series of functions with which to create drawings or figures. If we want to make a floor plan, we have several options available in this program that will help us in this regard. One of them is the Shapes function, with which we will be able to draw shapes such as rectangles, circles and many other figures, with which we can obtain that 3D or 2D effect that we were looking for in this case. On the other hand, you can also use the Online Images function, which will allow us to insert illustrations or drawings that we have found on the Internet. This option will give us a somewhat more realistic and possibly more professional result.
Place the plane in the document
In this case we are going to make use of the Forms option, so that you can see the steps that you yourself have to follow in this process, to draw this plane from scratch in a Word document. If we bet on this method, the first thing we will have to do is delimit the property area. So we already have that base that we will be able to use in the design of the plane in question in the document. This is something we can do by following a series of steps:
- Open the document in Word where you want to create that plane.
- Position yourself at the point in the document where you want to insert the plan.
- Go to the Insert menu in the toolbar at the top of the screen.
- Select Shapes.
- Click on the Rectangle option.
- Using the mouse, move the cursor to form the desired size of the rectangle in the document.
- Go to the Fill shape option.
- Choose the No fill option in this case. If you want to be able to change the color of the contour of this figure, then you have to click on "Shape contour" and choose the desired color for that contour.
- Click on Stripes.
- Choose the Script option.
With these first steps we have created the rectangle, which serves as the base of this plane. That is, it is the figure that will represent the home or place that is being represented on the plan. Once we have this outline, it is time to create the interior of the property in question. That is, we have to indicate the rooms, so that this plan is completed. This is something that may take some time, but we can do without too much trouble.
Delimit the rooms
We already have that plane, so the second step in how to make a plane in Word, is to create the rooms. We are going to have to draw the limits of your home in this document in Microsoft software, in the rectangle that we have created in this case. The steps we have to follow now are:
- Situate yourself in the rectangle that you have created in Word.
- Click on the Insert option at the top of the screen, in the toolbar.
- Click Illustrations.
- Select the Shapes option.
- Choose a new rectangle and draw this figure inside the rectangle that you have created, keep in mind the size you want to use.
- Next you have to set the measurements, something you can do using the horizontal and vertical ruler available in Word.
- Draw the hallways and other areas of the house. Go to the Line option for this.
- Drop that line. You can change the size of them to your liking, in addition, the Alt option allows you to have more precision in this regard.
- When you've finished drawing these lines, select all the shapes while holding down Ctrl. Then right click your mouse.
- Choose the Group option. This option will make a single figure form, which you can then move in the document to your liking, for example.
- If you want to draw a door or a window, you have to select the Delay shape from the Flowchart group.
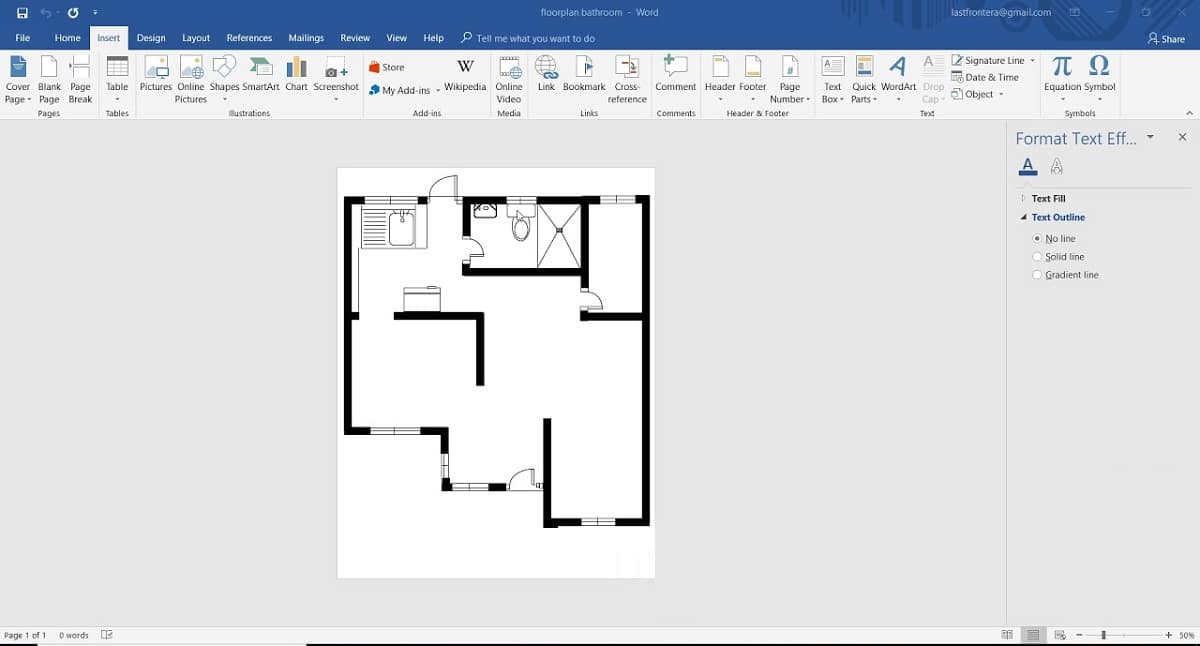
With these steps we have created the limits of the house inside, showing the size of each of the rooms that we have in that house, so the plan has already been completed in this regard. It is not a professional plan, but at least it is a good way to show how that house is divided and thus have a good idea, either for us, when fixing or redecorating a house, or if we have to. show someone.
3D modeling
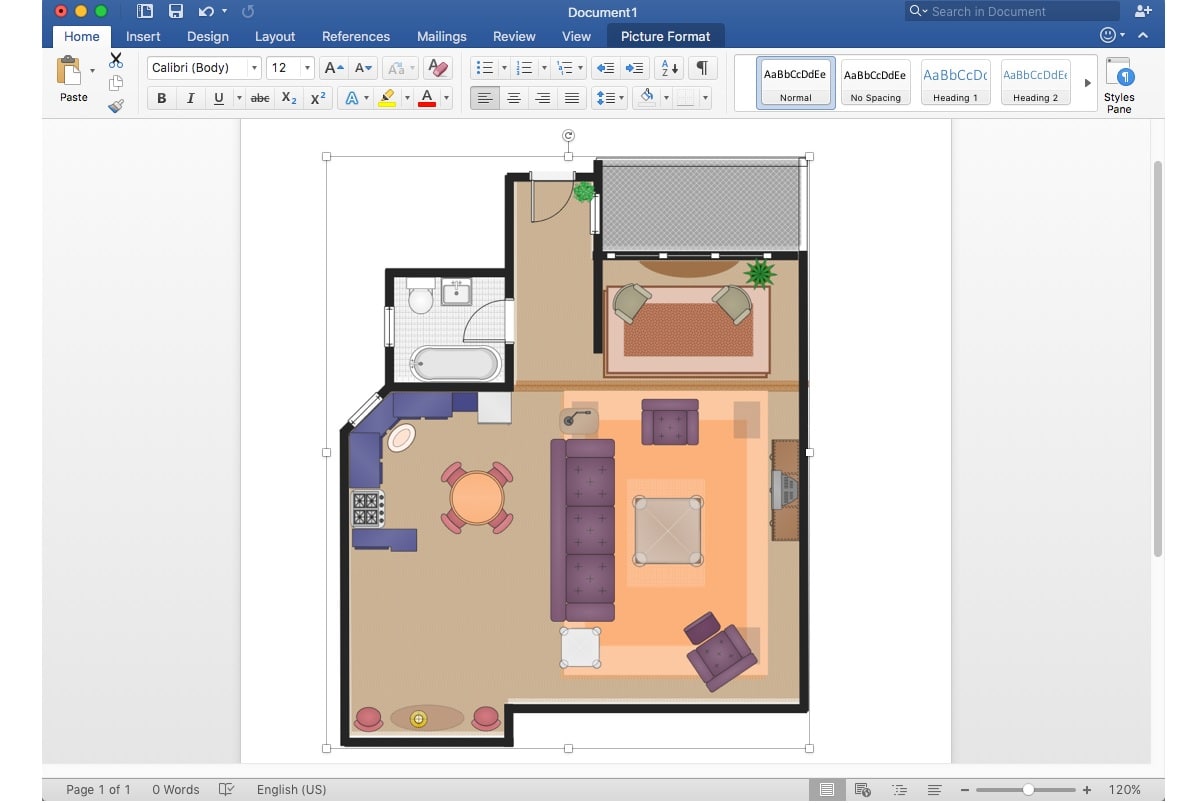
The plane we have now created is a 2D plane. Word also gives us the possibility of having a more realistic design, something that can be done if photos are added, for example, in this plane that we have created now. That is, in this way we will be able to generate a perspective of a figure in three dimensions. This is something that in many cases can help to better visualize the space or to see the possible options we have in case of any reform in that space.
The process with which we can do this is similar to the previous one, since we are going to use some of the same figures that we have used before. Even if in this case we will also have to add real photos. This is something that will also help to obtain a more professional and much more realistic effect at all times. So it may be that for some users it is something of interest to do. The steps in this regard are not too complicated. This is what we have to do:
- Draw a Rectangle and choose a dark color.
- Insert the Trapezoid shape into it so that it looks like the ground.
- Download an image from the Internet, which we are going to use later through the Insert option and then choose the Online Images option (they can be from the room you want in this case).
- The photos must be in PNG format, since this is something that will then allow you to erase the background of the image and leave only the elements that you need to use in your design. You can erase the background using tools on the web, such as Online Image Editor, which provide functions to erase the background of photos.
- When the photo is ready, you can add it.
- Click on the Insert option and then choose Images.
- Choose the photo in question that you want to incorporate into your design on the map.
- Repeat the process with other rooms in the house, where you will be adding other photos.
- Finally, join all the figures using the Lines function in the document.
This design is much more realistic, since we have that combination of the 2D plane with the images, so you get a professional result. It is a somewhat longer process, since we will have to look for photos for all the rooms in the house, which are also in the appropriate format for it and have to erase the background of them. So doing this is something that is going to take more time, although it is still a way of being able to make a plan in a document in Word. But it may not be an option of special interest for many users, especially if the plan is simply for their own use, not because they want to show it in a professional or commercial way. In any case, this way you will be able to see the ways in which we can create both the 2D and 3D plan.