
Are you one of those who work on a day-to-day basis with a Chromebook? These ChromeOS-based laptops, are very similar in operation to a smartphone or Android tablet. And many of the features are available, like now being able to take screenshots. Still don't know how to make them? Now we will explain, step by step, in this tutorial how to take screenshots on a chromebook.
Also, just like in Windows or Mac, Chromebooks also allow full or partial screenshots. In the latter, it will be you who decides which part you are interested in capturing. On the other hand, we will inform you of the different keyboard variants on the market, as well as if you work with an external keyboard. In addition, we will inform you where all these screenshots that you take are stored, so that you do not end up dizzy searching through all the folders.
In the current offer of computing, there are many alternatives and with different operating systems. Windows, Mac, some Linux distros and, yes, there are also people who on a day-to-day basis are enough with a Chromebook. A tool that can work perfectly if we base our work in the cloud or with a clearly office orientation: writing texts, email management, as well as leisure multimedia -Netflix, HBO, YouTube, Prime Video or Disney+.
Chromebooks, although they can be used by all users in the market, from the beginning they were oriented to the classrooms: an easy and comfortable way to introduce the little ones into the world of technology.
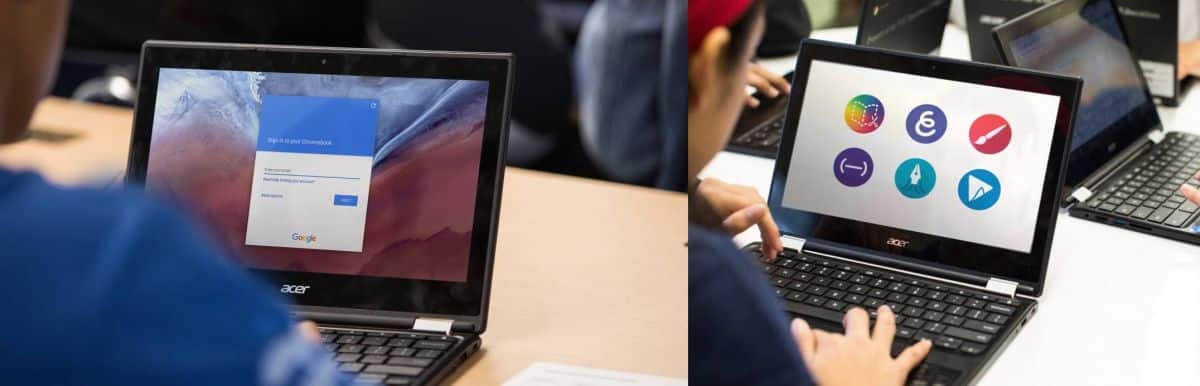
Android App Compatible Chromebooks

Although its market launch was around the year 2009-2010, it was not until years later that models that could go further were developed. Besides, knowing the potential that Android had -especially as far as applications are concerned-, it was to be expected that sooner or later the compatibility with the applications of the platform will arrive. Of course, theirs have taken time, but it is true that the range of possibilities has opened up a lot with these teams.
Intended for education and with low prices – other brands have tried to bring their models to the market
As we have well commented, Chromebooks were -originally- geared towards education. Of course, more and more professionals are basing their work in the cloud, so these teams can be a good solution. And in the market you have models of brands as recognized as Acer, HP, Samsung, ASUS or Lenovo.
Meanwhile, Microsoft also knows about the importance of the classroom and does not want to miss out on its slice of the pie. Hence, it presented the Microsoft Surface Laptop Go model, based on Windows, but at a more affordable price than the rest of the range and focused on mobility and large battery capacity.
Take screenshots with a Chromebook – the different alternatives
Leaving aside the little history of the Chromebook in the market, we focus on the topic at hand today. and is the be able to take screenshots on a chromebook. And depending on the model we have, we will have one key or another. Of course, with all of them -don't worry- you can carry out the action.
Screenshot with the keyboard of a Chromebook
The first option that we are going to give you is the possibility of taking a full and partial screenshot. And always speaking that we do it directly from the physical keyboard integrated into our Chromebook. This can be done in the following way:
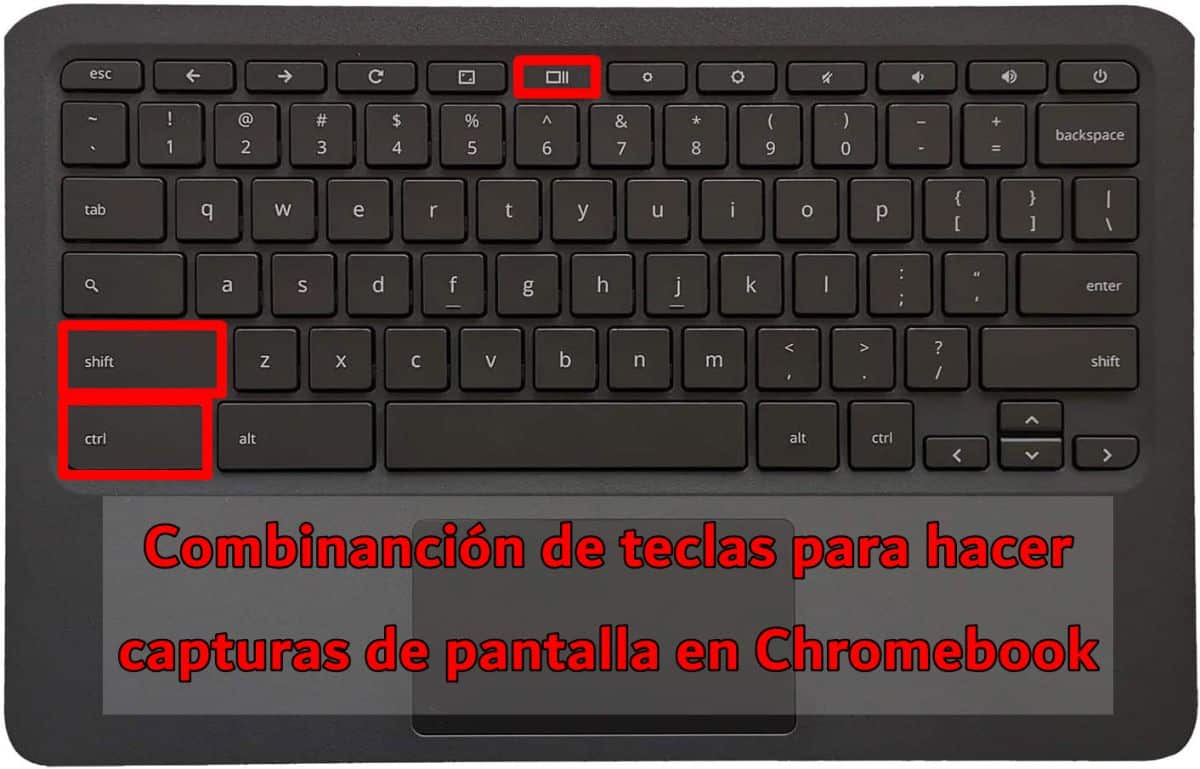
- If your Chromebook, has a screenshot key -a key with a camera drawn on it-, press it. If you do not have it, you must resort to the combination CTRL+SCHIFT+SWITCH WINDOW
*this last key has a drawing with different correlative windows -you can see it well in the image above-.
Then you must choose what type of screenshot you want to take:
- Logistics: you will have to select the option that shows you a window with four well-defined corners
- Partial: here you must choose the option that shows you an icon with a window with 3 well-defined corners and a symbol (+) in one of the corners
In the latter case, your mouse cursor will turn into a cross that will allow you, by dragging around the area, to select the part you want to capture.
How to take screenshots on a Chromebook using an external keyboard
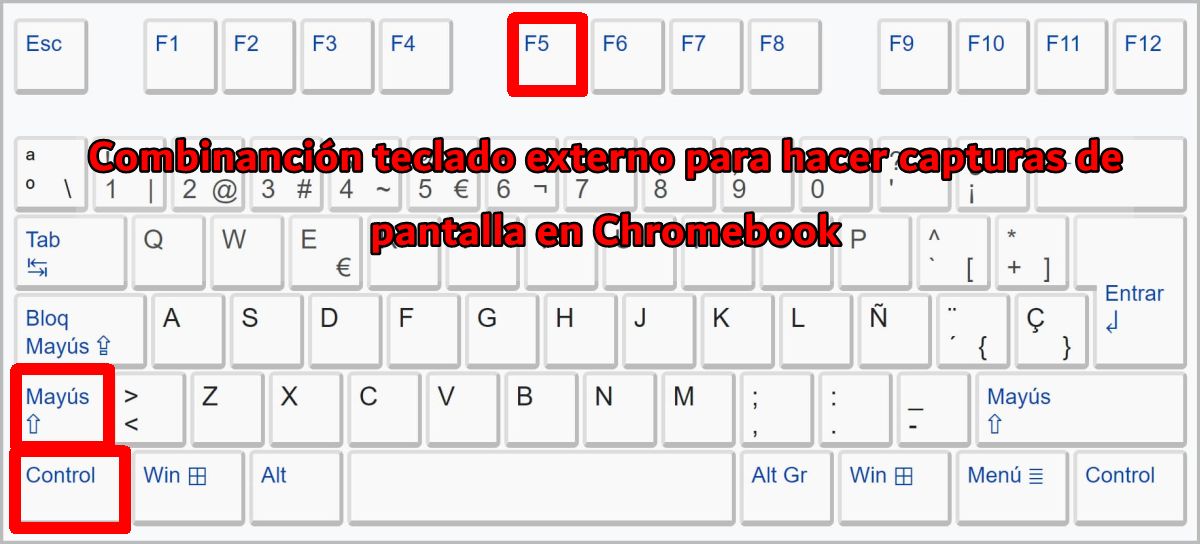
Perhaps for ergonomic reasons, you prefer to work at home or in the office connecting an external keyboard with more standard measurements to your Chromebook -Chromebooks can be smaller models than usual and penalize massive typing-. So, in this case it is normal that the dedicated keys to take screenshots or screen changes are not present. However, with another key combination, you will be able to invoke the screenshots menu. And the selection will depend on you. This is the combination:
Editing the screenshots
As in other devices on the market, and regardless of the operating system, we can choose the size of the screenshot or crop only the side we want. To do this, once the capture is done, press the TAB key until we arrive with the selection to the image.
Once on it, with the cursors or directional keys, we can adjust the size to our liking. That is to say:
- up/down keys: we will modify the height of the captured image
- right/left keys: we will modify the width of the screenshot
Of course, by using Google Play we can download the image editing application that suits us best and make the final touches to the captures taken. We leave you a selection of 3 interesting applications in this area.
Where are screenshots taken on a Chromebook saved?

As we mentioned at the beginning of the article, we also wanted to tell you where -folder- all the screenshots made on your Chromebook are saved. By default, screenshots are saved in the 'Downloads' folder.
However, if you want to choose another destination because you have created a folder exclusively for this purpose, by invoking the capture menu (CTRL+SHIFT+F5 or switch windows), in the popup menu select the configuration option. It's time to click on 'Select folder' and choose the location that you like best.