
The digital certificates They are already essential documents to carry out all kinds of operations and virtual procedures in the different administrations, such as the Tax Agency or the Social Security Agency. More and more people are installing these certificates on their computers, although it is also possible to do so on a tablet or mobile phone. In this post we are going to see how to install a digital certificate in android
Having this type of certificate on a mobile device has many advantages. If we have it installed on a computer, we will have to go to it every time we need it. On the other hand, if we take it with us on our phone, it will be accessible anywhere and at any time.
There are two types of certificates: some that serve to identify us with an additional degree of security on certain web pages with additional security, generally required in cases where security is especially important. Is he equivalent to digital signature and we use them, for example, to carry out procedures with the administration.
The other type of digital certificates is what is known as root certificate, which identifies the issuing authority. These certificates authorize other certificates, so it is necessary to have them pre-installed in the browser or operating system.
Thus, to install a digital certificate on Android, the first thing we have to do is install the root certificate. Once this is done, you have to obtain the certificate in question and install it. We explain below how each of these processes are carried out:
Installing the root certificate
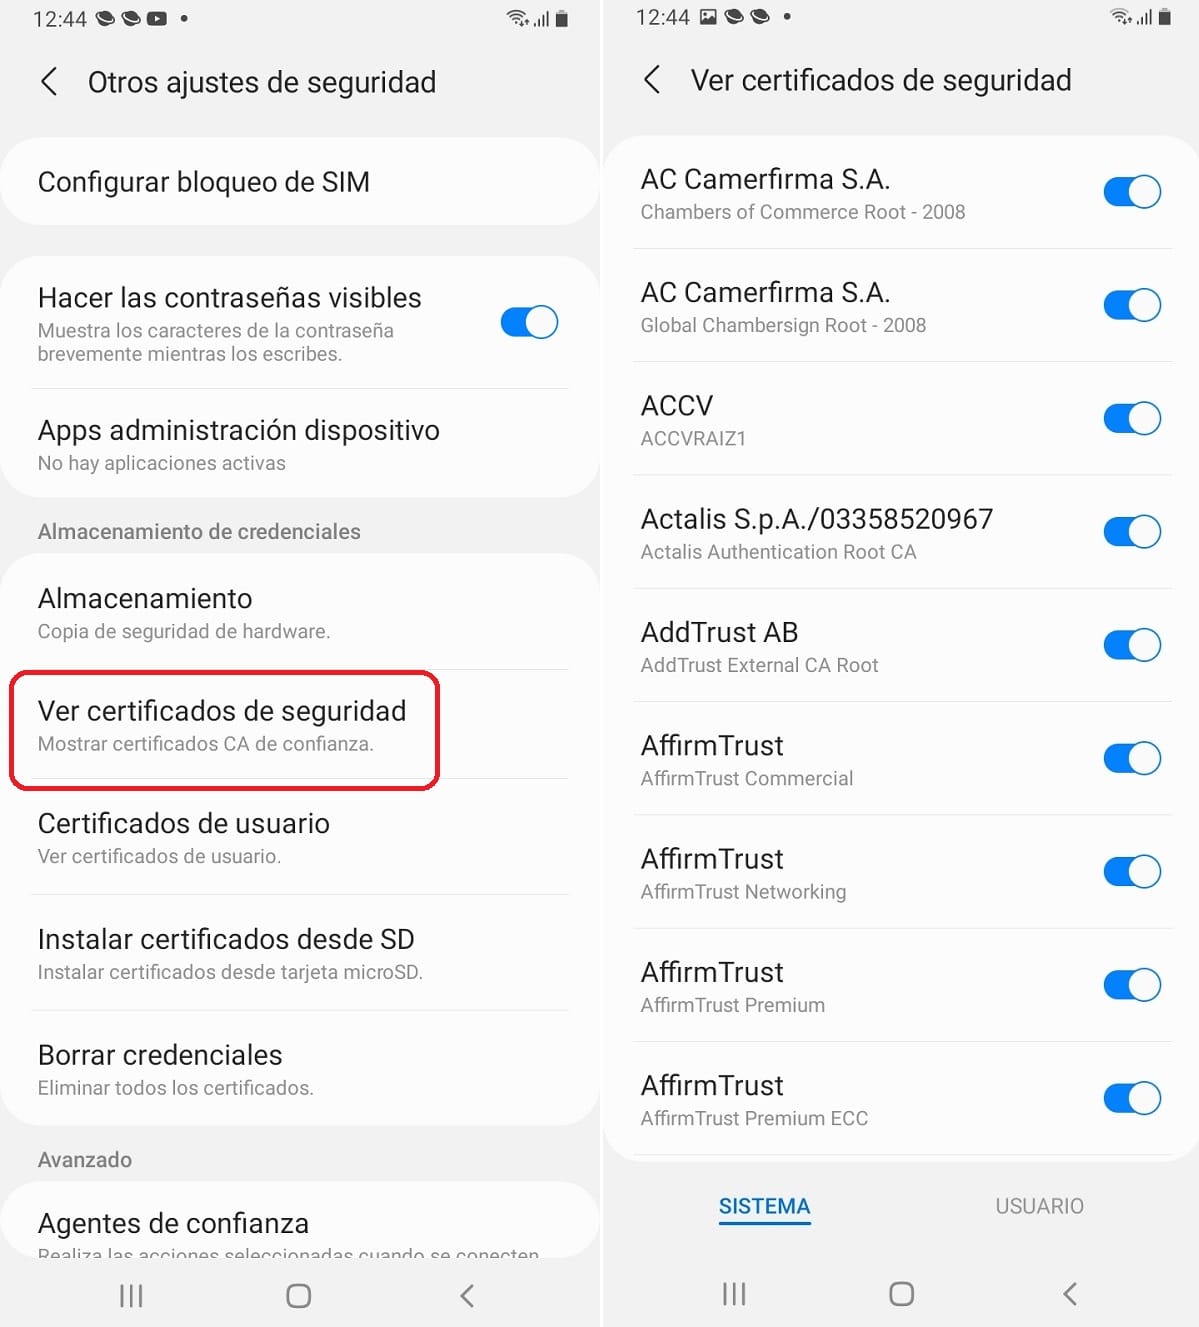
This is the previous and essential step before installing a digital certificate on Android: it is necessary to install the root certificate of the competent authority, for example, of an Autonomous Community or of the State. Before proceeding with the installation, it is convenient to know if it is already installed on our device. To do this check you just have to go to "Android Security Settings" and select the option of "View security certificates".
If the certificate we need is not on the list, it must be downloaded and installed manually. For this you have to visit the official website of the administration in question and use the corresponding download link *. This is a .CER file which will open automatically through the certificate installer from our phone. We just have to press "OK" to complete the process.
(*) It is likely that, since we do not have the certificate, we cannot directly access these pages from the mobile browser. If so, we will use “Advanced Options”.
Obtaining the digital certificate
This is the most important part of the process, which can vary slightly depending on which administration is issuing the root certificate. In any case, the basic steps are always the same, with three basic channels to download:
- From the Administration website.
- From the Administration Application.
- Using the ID.
Then you have to choose the option "Request digital certificate" and fill in the corresponding form. After accepting the conditions, in many cases it will be essential to go in person to an authorized registry office to prove our identity, in person.
Important: it is advisable to make a backup copy of our certificate and keep the password somewhere safe.
Installing the digital certificate on Android
And we are now going to the last part of the process, in addition to the simplest. And it is that the way to achieve it is exactly the same as that of the root certificate.
If we have obtained the certificate from a PC, we must first copy the .PFX or .P12 file to our mobile. This transfer can be done by cable, by memory card, by WiFi, Bluetooth, Google Drive, etc.
Finally, we open the Android certificate installer and follow the steps exactly the same as when we installed the root certificate. After this, the certificate will always be available in the option "View security certificates" or directly accessible from the mobile application of the administration in question.