
In today's post we will explain how to install ffmpeg in Windows 10. This is a collection of free software that, among many other functions, record, convert and stream audio and video. And all in an easy and fast way. Actually, it can be used both by people with advanced knowledge as well as by users with basic knowledge
Interestingly, the complexity of the installation process contrasts with the ease of use of FFmpeg once installed on our computer. Don't let this put you off, because the effort is worth it. In addition, following our instructions carefully, you can install FFmpeg successfully and without any problem:
Install FFmpeg step by step
It must be clear that installing FFmpeg in Windows 10 is as simple a process as that of other applications in use. In other cases, it is usually enough to download it to our computer and left-click on its .exe files. Then just follow the instructions. On the other hand, with FFmpeg things get complicated.
To systematize the task of how to install FFmpeg in Windows 10 we will organize the process in three phases (download, installation and verification), each of which is divided into small steps:
Phase 1: Download FFmpeg
How to install FFmpeg. Step one: download
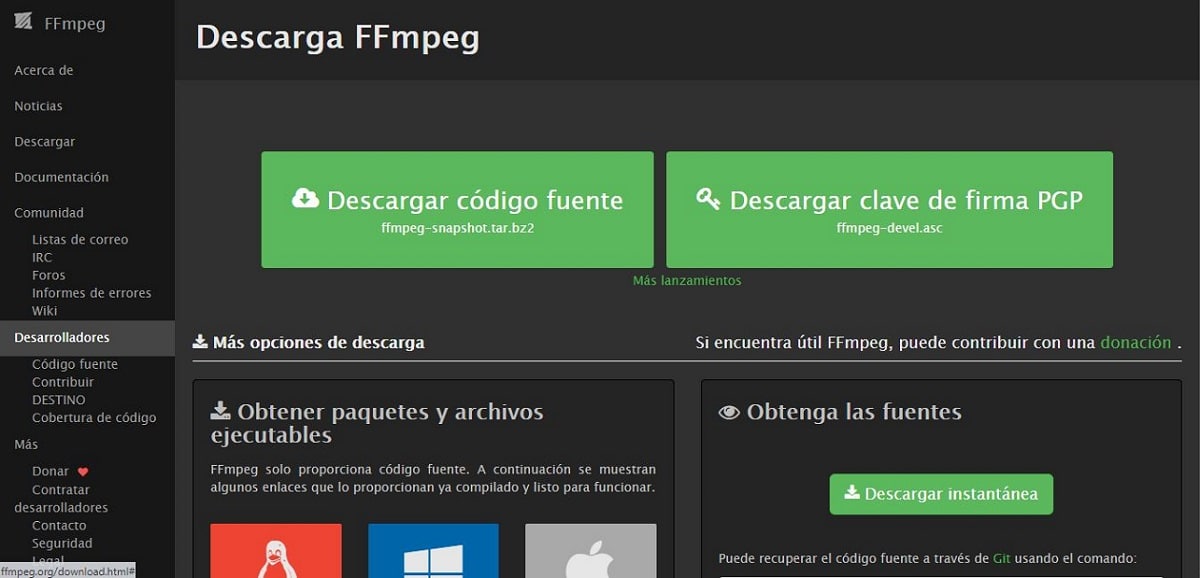
- Step 1:: First you have to go to FFmpeg official website, where the versions of the program are hosted for download. We select the latest version available (in this case, the one that corresponds to Windows 10), while choosing the processor architecture, that is, 32 or 64 bits. Once this is done, you have to press the blue button to start download.
Tip: to find out what the architecture of your processor is, open the Windows file explorer (Windows key + E), then select the option "This PC" and click on "Properties". There, in the dialog box, the information we are looking for appears: processor based on x32 or x64.
- Step 2:: Once the file is downloaded, we open the folder "Downloads" on our computer and proceed to place it in a specific folder. After that we will right click on the zip file and we choose the option "Extract to ..." in order to extract all the content to a new folder with the same name.
- Step 3:: It is advisable to rename the file to avoid confusion and work with it without problems, as we will see later. We will simply right click on the newly extracted folder and use the option to "Rename". It is best to give it the name of FFmpeg.
- Step 4:: We will conclude the first phase of the process of how to install FFmpeg moving the folder just named as "FFmpeg" to the Windows installation drive. To do this, we will right click on the FFmpeg folder and select "Copy". Then we will open the C drive of the computer in Windows Explorer, we will right-click on any blank area and select "Paste".
This last step is very important, since the command prompt will only execute the commands if the files are in the correct location.
Phase 2: Install FFmpeg
How to install FFmpeg on Windows 10
After the download is complete and the file is correctly located, the actual installation process begins here. These are the next steps to follow:
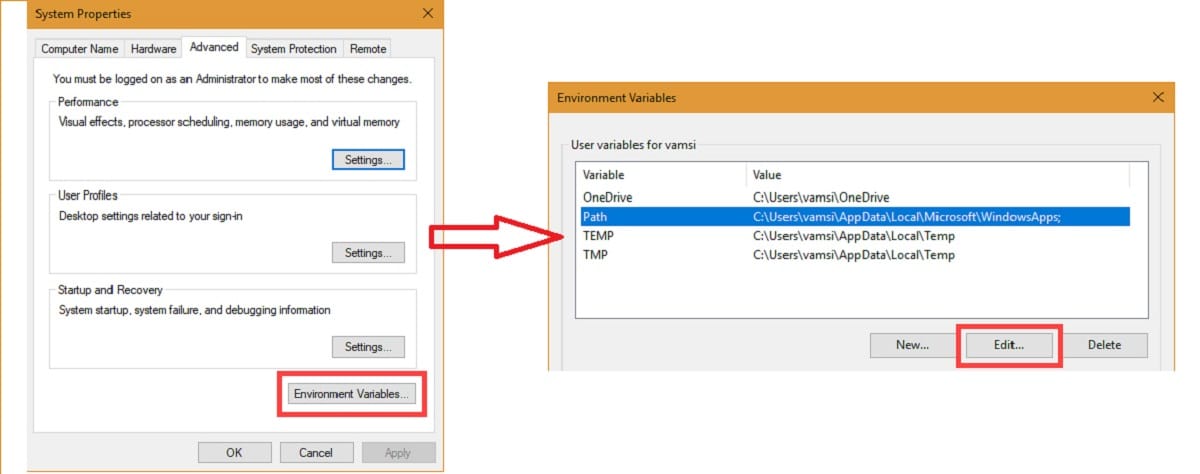
- Step 5:: We access "System properties" by opening Windows Explorer (Windows Key + E or clicking the File Explorer icon on the desktop). There we choose the option «This PC» and click on «Properties».
- Step 6:: Within «Properties» we select the tab of "Advanced system settings". Another option to get here is to press the Windows key on the keyboard and search directly for "Edit system environment variables."
- Step 7:: In this menu we select «Environmental variables», then in the "Environment Variables" and finally in "User variables", where we will select "Route" (See the image above, where the process is illustrated in English).
- Step 8:: In the upper right part of the dialog box, click "New" to add the correct file location below: C:ffmpeg bin. Then we will press «OK» to save the changes.
Phase 3: Verify the installation
At this point, the installation of FFmpeg on Windows 10 is complete, but before using the software, a series of verification checks and, if applicable, correction checks are required. So, we will add these two additional steps:
- Step 10:: We will press the Windows key on the keyboard (it is also useful to go to the taskbar and click on Start). There, we will look for the command prompt, right click and select "Execute as an administrator".
- Step 11:: Next we will go to the command window, where we will write "ffmpeg -version". After this we will press enter. If the installation was successful, the FFmpeg program will start on your computer. Otherwise, the following message will appear: 'ffmpeg' is not recognized as an internal or external command, operating program, or batch file. That will mean that the installation has been unsuccessful.
What is FFmpeg and what is it for?

FFmpeg Utilities
But before starting the installation process that we have detailed here, it is necessary to know what is FFmpeg exactly and for what reasons can it be such a useful tool for us.
FFmpeg stands for Fast Forward Moving Picture Experts Group, a popular open source multimedia project available on many different operating systems. Among other things, FFmpeg has the ability to perform a large number of audio and video operations. It covers all kinds of formats, even those that are already in disuse.
This free software project was born in 2000. Most of its developers are also from the project MPlayer. In fact, FFmpeg is hosted on the MPlayer project server.
The range of editing possibilities is enormous because FFmpeg contains numerous software suites and libraries. Between the highlights that we can carry out with this software are those of encoding, decoding, transcoding, converting formats, filtering, extracting or cutting. But there are many more. Knowing the options thoroughly we can obtain a great performance from FFmpeg.
Another feature that we must mention is the ease of use of this tool for the user. Virtually all operations can be executed from the Windows command prompt. You just have to resort to very simple line commands that are useful in any operating system (not just Windows 10). Here are some examples:
If we had to point out any deficiency or defect in FFmpeg, that would be the absence of a graphical user interface. For many users this is not a serious problem, but for others it can be an obstacle. Especially at the time of installation.
All in all, it is worth knowing this program and knowing how to install FFmpeg on our computers. By doing so, we will have a fantastic tool in our hands. In fact, more and more people are turning to it to the detriment of other popular and successful applications such as the VLC media player, for example. FFmpeg will have to be taken into account.
How to use FFmpeg
The FFmpeg commands allow us to perform numerous actions when editing video and audio files
Once the program is installed on our computer, its use could not be easier. All we have to do is open the command prompt as administrators. From there, it's about run each task by typing the corresponding command line.
Let's see it with a example. If we wanted to change the format of a video file that we have saved with the name "test", in this case from .mp4 to .avi, we would have to click on the command prompt, write the following line and validate by pressing Enter:
ffmpeg -i test.mp4 test.avi
Depending on the power of our PC and the size of the file in question, this conversion will take more or less time to complete. When finished, the new .avi file will be saved in the same folder as the .mp4 file.
The list of FFmpeg commands it is very extensive. Here are some of the most used and popular. Something to start with (all examples have the title "test" in the file name):
- To get information from a file: ffmpeg -i test.mp4
- To convert images to video (the example file is called "test.mg"): ffmpeg -fimage2 -i image%d.jpg test.mpg
- To convert a video (test.mpg) into images: ffmpeg -i video.mpg image% d.jpg
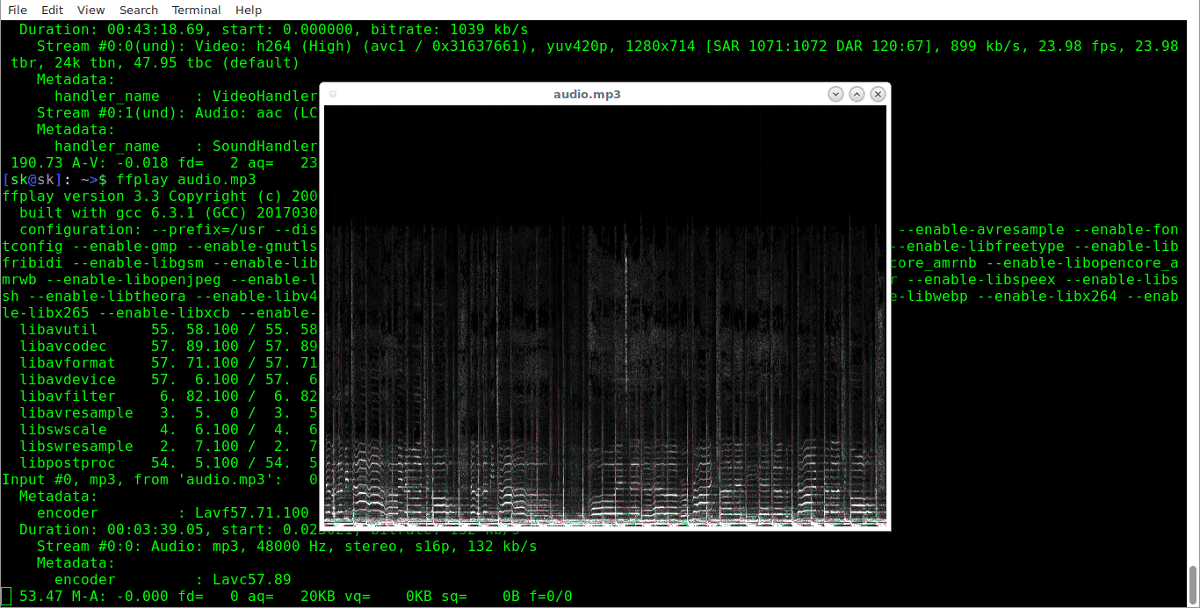
- To preview a video: ffplay test.mp4
These are just a few simple examples. Actually there are a lot of commands that we will be able to use to edit video and audio files with ffmpeg. The possibilities are vast. The only drawback that an unaccustomed user can face is that of having to work with commands and Terminal. But this is by no means an insurmountable obstacle. With a little patience and dedication you can learn to handle them quickly and easily.