
It is one of the archives of Windows 10 that generate the most controversy among users. Is it a friend or a foe? In this post we will try to explain everything about sedlauncher: what it is, what it is for and if it is really necessary to do without it. Or not.
Before addressing the issue, it must be explained that we will find the sedlauncher.exe program in the following location:
C:> Program Files> rempl> sedlauncher.exe or C:> Program Files> rempl> sedlauncher.exe.
It is included in the Windows Service designed to speed up and guarantee the Windows 10 update process.
Sedlauncher: what is it
First of all, it must be said that sedlauncher.exe It was created by Microsoft with the best of intentions. It became part of the Windows 4023057 update package KB10. The goal of its creators is that this process serves to improve the speed of the Windows Update Service on our computers. Well, in those that have the version installed Windows 10. These updates generally involve media drivers, audio drivers, service packs, etc.
It is important to clarify this point, because when the computer starts to work too slowly it is logical to think that our equipment is affected by a malware or virus. But no. The sedlauncher.exe file is digitally signed by Microsoft.
This update patch is very interesting as it helps to free up disk space on the device when it runs out of enough space to properly install Windows updates. Something certainly very useful.
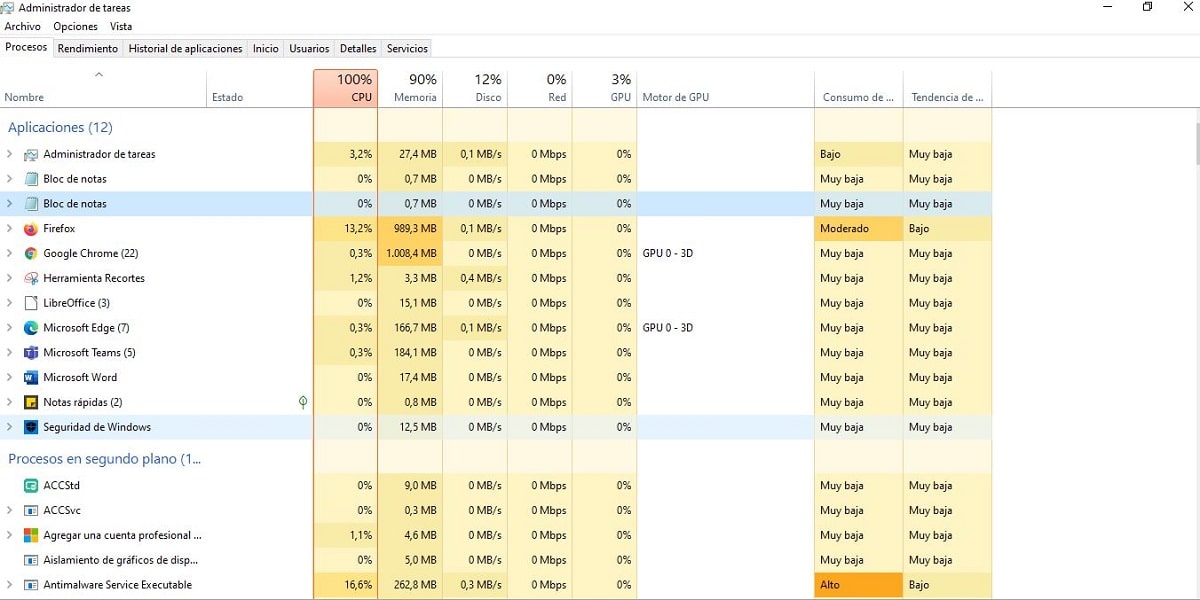
However, there is something that was not taken into account when this file was deployed within the Windows 10 update package. When the Sedlauncher process starts (which is very useful, everything has to be said, since these are intended updates to improve the performance of the operating system), our computer is forced to work at full capacity. And that has a negative part. While sedlauncher.exe is running, any other process that we try to run on our PC, even a simple one such as opening a file folder, will slow down desperately.
This happens because all CPU resources are taken over by Sedlauncher. There is no choice but to wait for the process to finish. In other words, during this time we cannot use our computer.
It is certainly not an ideal situation. That is why it is necessary to find solutions to remedy it. Some of them as drastic as directly uninstalling Sedlauncher.
How to disable Sedlauncher?
Once we know the basic information about Sedlauncher (what it is and what it does), especially knowing that it is part of Microsoft's KB4023057 update patch, it is time to decide whether to disable it. To answer this question, it is necessary to assess whether its benefits are greater than its drawbacks or not.
The following methods They will help us to deactivate this service in an efficient way so that it does not interfere with the use of the system memory.
Disable Sedlauncher from Task Manager
Disable Sedlauncher from Task Manager
This is the easiest and most direct way to disable a process. Of course, we can also use it to end the sedlauncher.exe process, since all the processes and services that run on your system can be regulated from the Task Manager.
To deactivate or disable Sedlauncher, follow the steps detailed below:
- Step 1: First, you have to open the "Run" dialog box in our system by pressing "Windows Key + R" or from the start menu. We can click on the Windows icon that we have in the lower left corner of the taskbar. There we write "run" in the search bar and open the run dialog.
- Step 2: We start the Task Manager. To do this, in the run dialog box we write the text 'taskmgr' and then we press "To accept".
- Step 3: Once the Windows Task Manager menu, we see a list of options just below the menu bar. In this list you have to select "Processes" and there choose the option «Windows Correction Service«.
- Step 4: In this option we click with the right mouse button and select "Finish homework".
- Step 5: To finish, we exit the Task Manager and we reboot the system. This will apply the changes made.
This solution is the most radical, since it eliminates all Sedlauncher actions in our equipment at a stroke. Gone are the moments of slow operation, but also the updates to improve the system. If you think it is too much you can try the following method:
Disable Sedlauncher services
For this option you have to act through the Windows service administration tool and change the properties of the service. This is a less intrusive way of solving the CPU slowdown problems caused by Sedlauncher. This is how it should be done:
- Step 1: As in the previous method, we open the "Run" dialog box in our system with the Windows + R keys or from the start menu or by clicking on the Windows icon located in the lower left corner of the task bar. We type "execute" in the search bar and start the execution dialog.
- Step 2: The text that we must enter in the dialog box is this: 'services.msc '. Once this is done, we will press the button "To accept". At this point, the question may appear on the screen as to whether we want to run as administrators. In that case we will answer yes and continue with the process.
- Step 3: In the long list of options that opens below, we look for the one of "Windows Correction Service". By clicking on it we select the option «Properties».
- Step 4: On the tab "General" In the menu that appears at the top of the window, we look below for a new drop-down menu about «Start Type». There we simply select the option "Disabled" and we validate by clicking OK.
After completing those four steps we restart the computer to apply the changes.
Block Windows Patch Service Through Firewall
Sedlauncher: what it is, what it is for and how to disable it
Another possible option to nullify the negative effects of Sedlauncher is to use a firewall to protect against it. This is how we should proceed:
- Step 1: First we go to the menu "Start" which we will access through the Windows icon located in the lower left corner of the screen. Another way to do it is by pressing the Windows key on our keyboard. In the search box we write "Windows Defender Firewall" and we select it.
- Step 2: Next, in the menu on the left we click on "Advanced configuration". We may get the box with the option to "Run as administrator." If so, we will answer yes.
- Step 3: Back to the menu on the left side, we select "Outgoing rules" and there the option "New rule" that we will find in the upper right part of the Windows Firewall window.
- Step 4: A pop-up window will appear before our eyes with various options. In it we choose the one of "Program" and we validate by pressing "following".
- Step 5: Under the program path, we click the button "Examine". This will lead us directly to the location of the "Windows Patch Service" from our PC. The exact place where what we are looking for is found is C:> Program Files> repl.
- Step 6: The last actions we must perform are to select the file called "Sedvsc.exe" and complete the lock by clicking on the following validation options that will appear below. Then it will only be necessary to assign a name to this new rule, click on "Finalize".
It may happen that, after deactivating Sedlauncher following this method, the patch is automatically downloaded to our computer again. If this happens, we will have to reconfigure our Windows Firewall O well download an antivirus able to block it. If the block is effective, it can no longer be executed on our PC.
Final conclusion
Now that you know the three most effective and safest methods to block or uninstall Sedlauncher, there is still the most difficult part: make the decision to do so. It is not that by disabling this program some hopeless catastrophe will happen to your computer, but you must be aware that you will lose the functions it provides, which are related to the best performance of your PC.
However, if you are reluctant to get rid of Sedlauncher, you will face the possibility that your computer may run slower. Even that at times it becomes "paralyzed." And this is a program that consumes a lot of disk space. Sometimes up to 100% of the CPU.
Like everything in life, it's about weighing the risks and benefits. This is usually the decision-making process: you lose something to gain something. In principle better. Each person, that is, each Windows user, is a world. Let everyone decide what they think is best for them.