
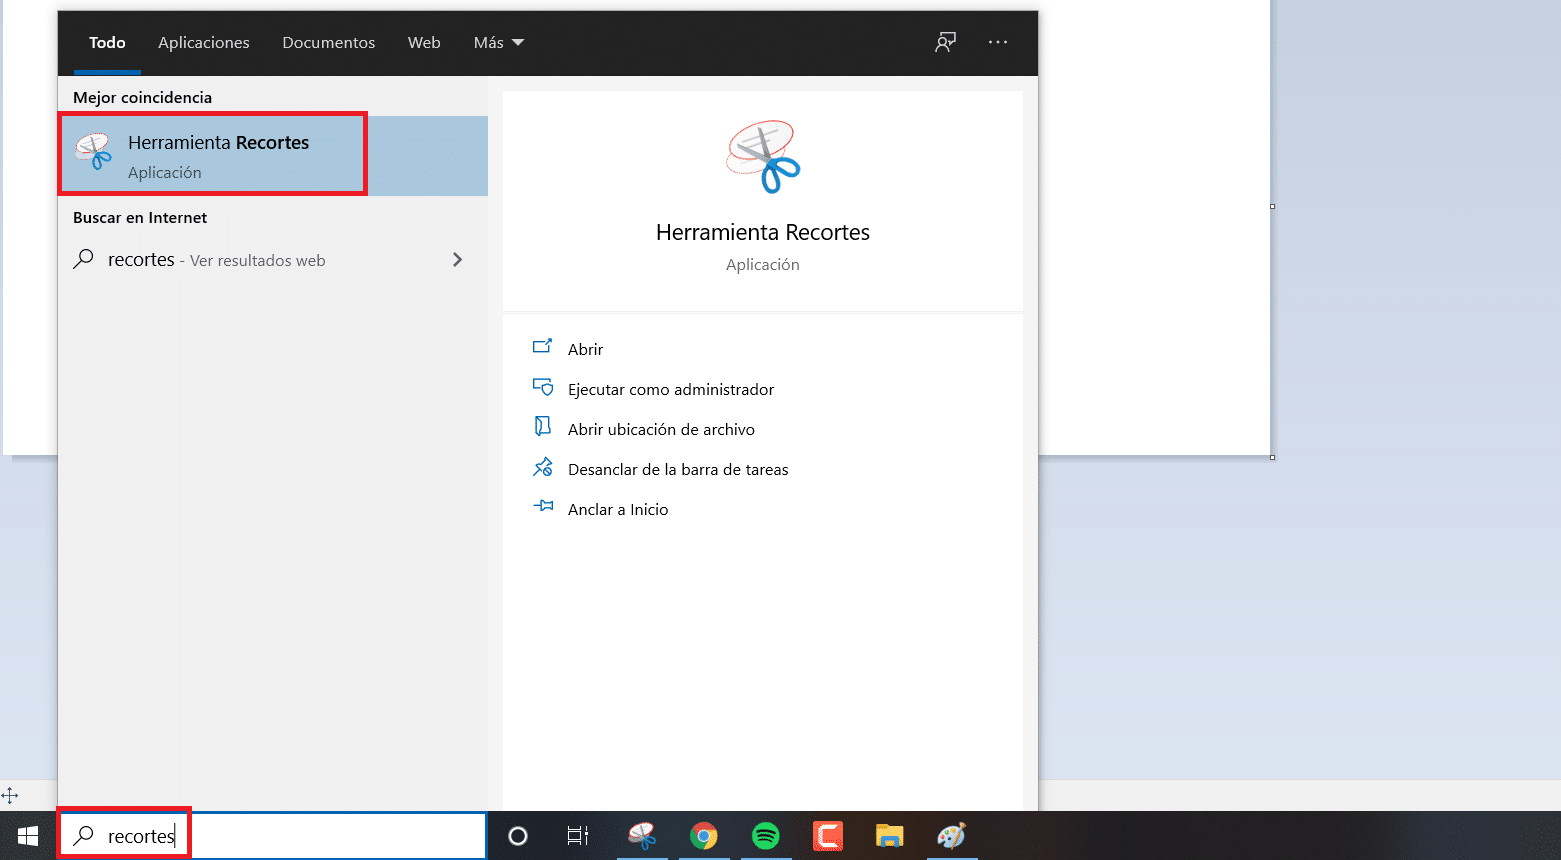
Take screenshots in Windows 10 or in any other operating system it allows us to document a work for class, a document in which we are working, store an image that cannot be downloaded from a web page, capture the image of a video, the cover of a game ...
The important thing when taking screenshots is to know what method to use, since not all of them allow us to take a screenshot at specific times or they are not fast enough methods to allow us to preserve in an image what is shown on our computer screen.
Windows Snipping Tool
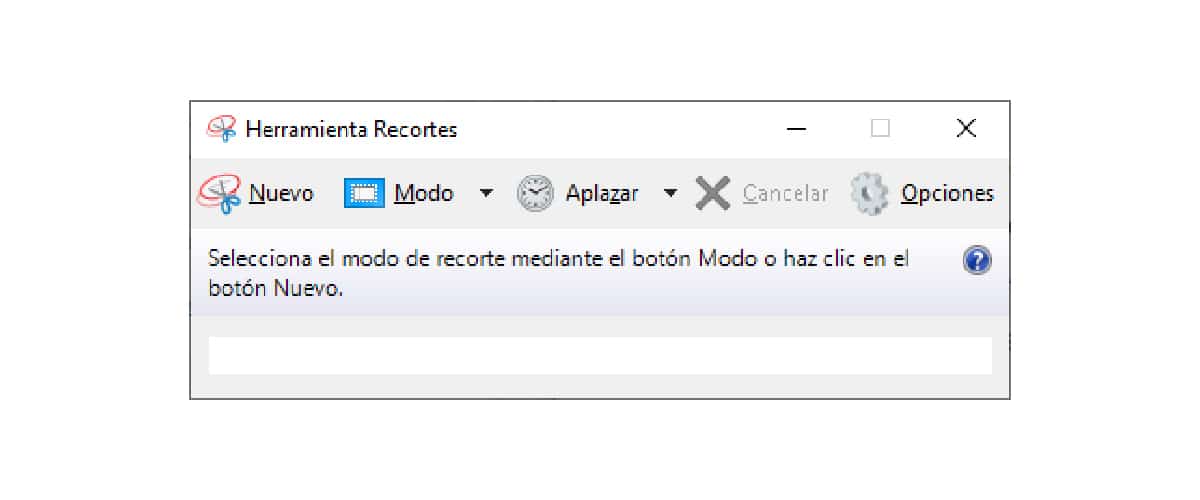
Windows 10, like Windows Vista, offers us the Snipping app, an application that allows us to do full screen snapshots of our device, of a window, of a section that we delimit or cut freely.
To select each of the modes that we want to use, we must click on the Arrow down displayed just to the right of Modo.
Freeform Crop mode
Free-form clipping will take screenshots of objects that are displayed on the screen of our computer.
Rectangular Crop mode
Thanks to the rectangular cutout, we can take a capture of a specific area of the screen.
Window Crop mode
This mode allows us to capture a window of a specific application, which will avoid having to cut the elements that we need later.
Full screen crop mode
This mode is designed to take a screenshot of all the content displayed on the screen. In addition, it allows us to set a delay timer, a timer that allows us to delay the capture up to 5 seconds.
Print Scrn key (Prt Scr)
The Print Screen key, located in the upper right corner of the keyboard is, since Windows 3.1, the native tool available to take screenshots, a key that copies the content to the clipboard.
The only but of this function, if we do not have the clipboard history activated, is that we can only take a screenshot each time we use that key, since we have to convert it to an image through an application (Paint is more used) by pasting the captured image with the command Control+V.

If we have the clipboard history activated, we can take as many screenshots as we want and discuss only those that interest us the most by selecting them from this history. To access the clipboard history, press the key combination Key windows + v.
Activate clipboard history
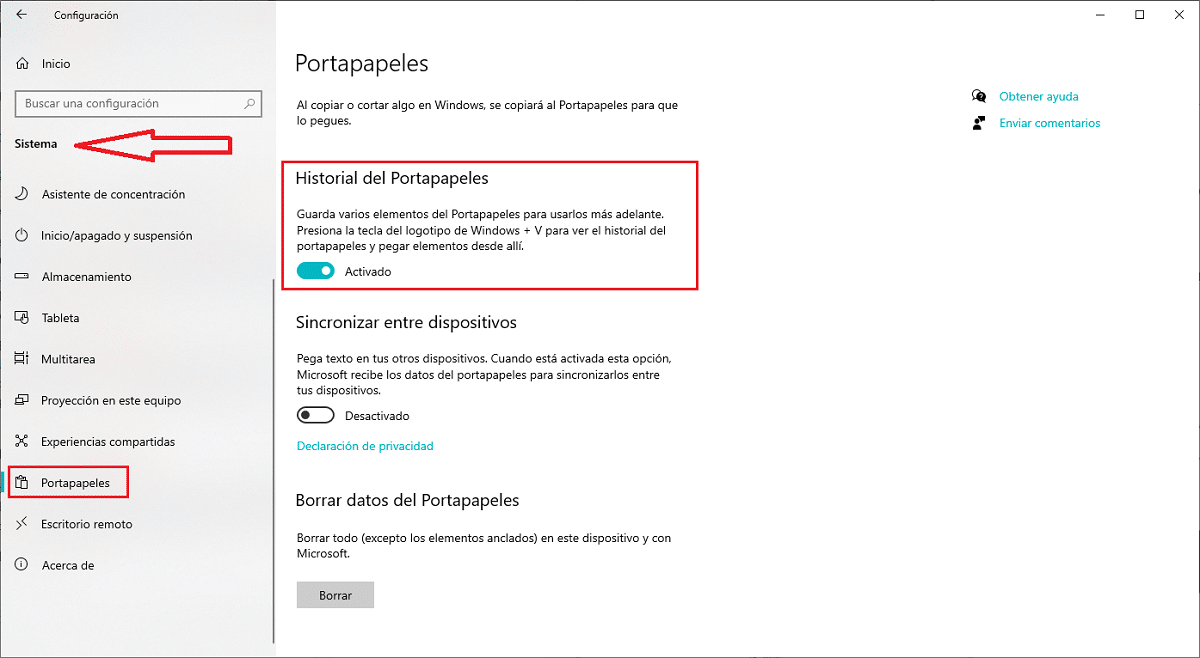
- To activate the clipboard history, we have to access the Windows configuration options by clicking on the gear wheel located in the start menu or through the keyboard shortcut Windows key + i.
- Next, click on System - Clipboard and activate the switch Clipboard history.
Alt + Print Screen (Prt Scr)
Another utility that we find in the Print Screen button on our keyboard, allows us to take a screenshot of the window in which we are pressing the Alt key.
This shortcut will copy the application image to the clipboard that we are using, an image that we must later transfer to an image file by pasting the capture in the Paint application with the Control + V command.
Windows key + Print Screen (Prt Scr)
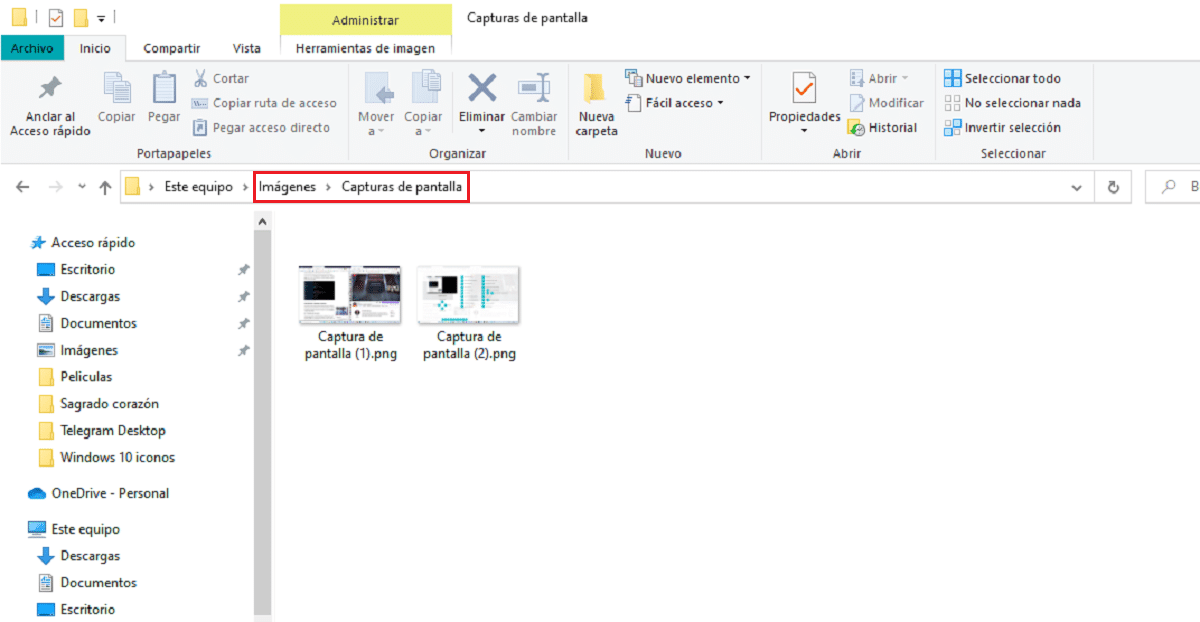
If what you need is to directly save each and every one of the screenshots you take, you can use the key combination Windows key + Print Screen. Each time you press this key combination, the screenshots will automatically be saved in the Screenshots folder, within the Pictures folder located in My Documents.
Windows key + Shift + s
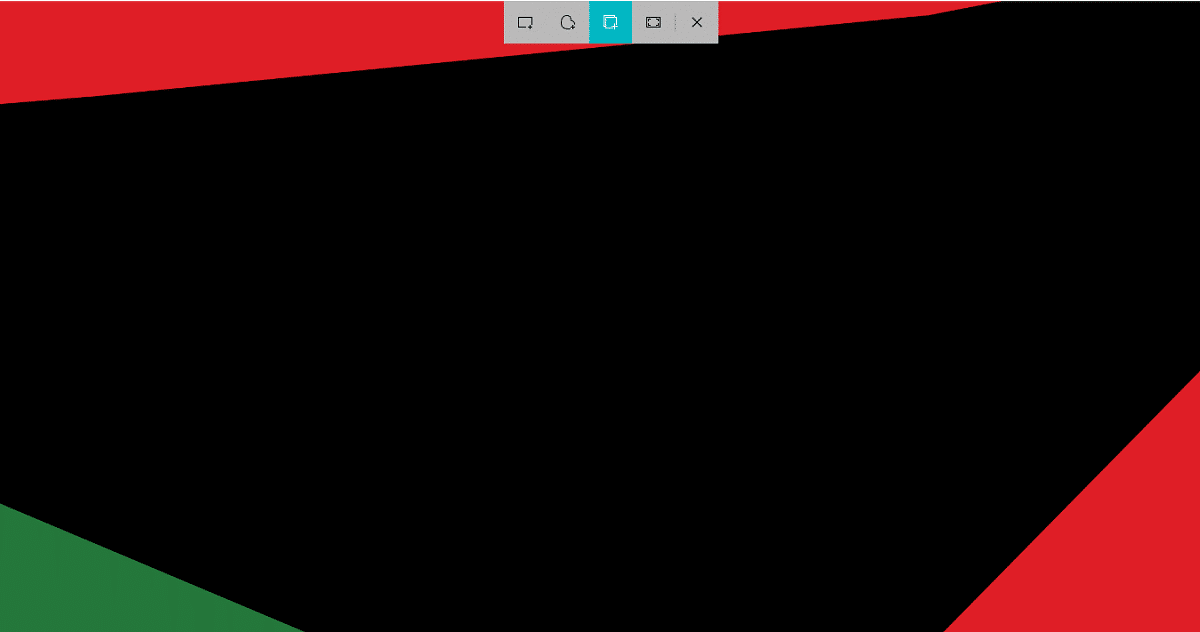
The Windows 10 Snipping Tool has its days numbered, according to Microsoft, every time we open this application. Although it is true that it is very intuitive, it is not fast. The method that will replace the Snipping application in the future is the key combination Windows key + Shift + s.
When you press on this combination of keys, the four options that it offers us will be displayed at the top of the screen, which are the same as those found in the Snipping application. To know which icon represents each method to make a captureWe just have to place the mouse over the option and wait a second.
Once we have made the capture, we have to access the notification center to access it, annotate, highlight text, trim it and, most importantly, store it on our hard drive, otherwise it will be lost with the next capture we make using the same method.
Rectangular Crop mode
The rectangular cutout does not allow you to capture a specific area of the screen.
Freeform Crop mode
Freeform cropping allows us to take screenshots of objects / elements that are displayed on the screen.
Window Crop mode
This mode is designed to capture a window of a specific application.
Full screen crop mode
The full screen crop mode does not allow you to take a screenshot of the entire screen of your device. If we have two monitors connected to our computer, the screenshot will include the two desktops.
No need for third-party apps
The number of options that Microsoft offers us to take screenshots is so high that it is not necessary at any time to use third-party applications. The best third-party applications that we can find in the Microsoft Store is Snip & Sketch, an application that offers us the same functions as the key combination Windows key + Shift + s.
This combination of keys allows us to make annotations in the screenshot that we have made, highlight text, cut the document ... This keyboard shortcut is one of the most complete and fast, hence over time the Snipping tool goes to disappear in future versions of Windows 10, a tool that will continue to be available in earlier versions of Windows.