When computing began to replace physical media on paper, an associated obligation was born: the backups. While the chances that a document or file in physical format will disappear are quite low, if we talk about digital support, the possibilities increase due to the different factors that come into play.
Digital media are electronic elements that can stop working at any time, sometimes for no apparent reason. In addition, they can also be affected by malicious software (viruses, malware, ransomware ...) hence it is an intrinsic need of computing make backup copies.

Aspects to take into account when making backup copies
When making backup copies, we must take into account a series of factors:
The important thing is the documents, images and videos
A few years ago, install a copy of Windows it took a large number of hours, not only due to the speed of the equipment, but also due to the time taken to install, one by one, the drivers for all the components that were part of those equipment.
This, forced Windows to offer us the possibility of make a full backup of our operating system along with our files, a possibility that is currently not available. Windows 10 only allows us to make a backup copy of our files.
Do not use a hard drive partition
From the same hard disk, we can create different partitions, which are nothing more than disk units that use the same physical storage medium, so if the hard disk crashes, we will lose all the information, since all the units will stop working.
Use an external hard drive
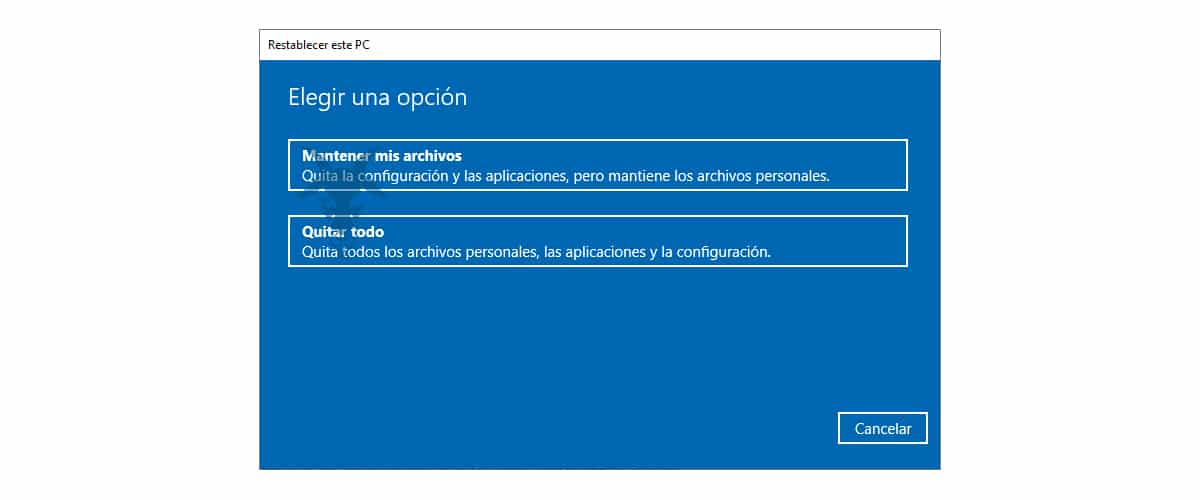
Use an external hard drive To make backup copies is the best way to avoid that in case our equipment suffers a problem that affects its integrity, the data of the copy is separated from the equipment.
Cloud storage
Cloud storage services are the fastest and most comfortable way to always have a copy of our documents through any device, being OneDrive, the service that best integrates with Windows 10.
In addition, it does not force us to download all the content that we have stored in the cloud, but only the files with which we are working at that moment and upload them again when we have finished, a process that OneDrive takes care of doing it automatically. This allows us to use the space on our hard drive for other purposes that are not related to our work.
Incremental copies
Traditional backup copies allow us to make exact copies of the documents that are in a unit, replacing the data on the target drive with the new ones. This can be a problem when we need to access previous versions of a file or recover files that we have previously deleted.
Incremental copies are responsible for making backup copies only of the files that we have modified or we have created new ones, keeping previous versions on old backups.
Backups in Windows 10
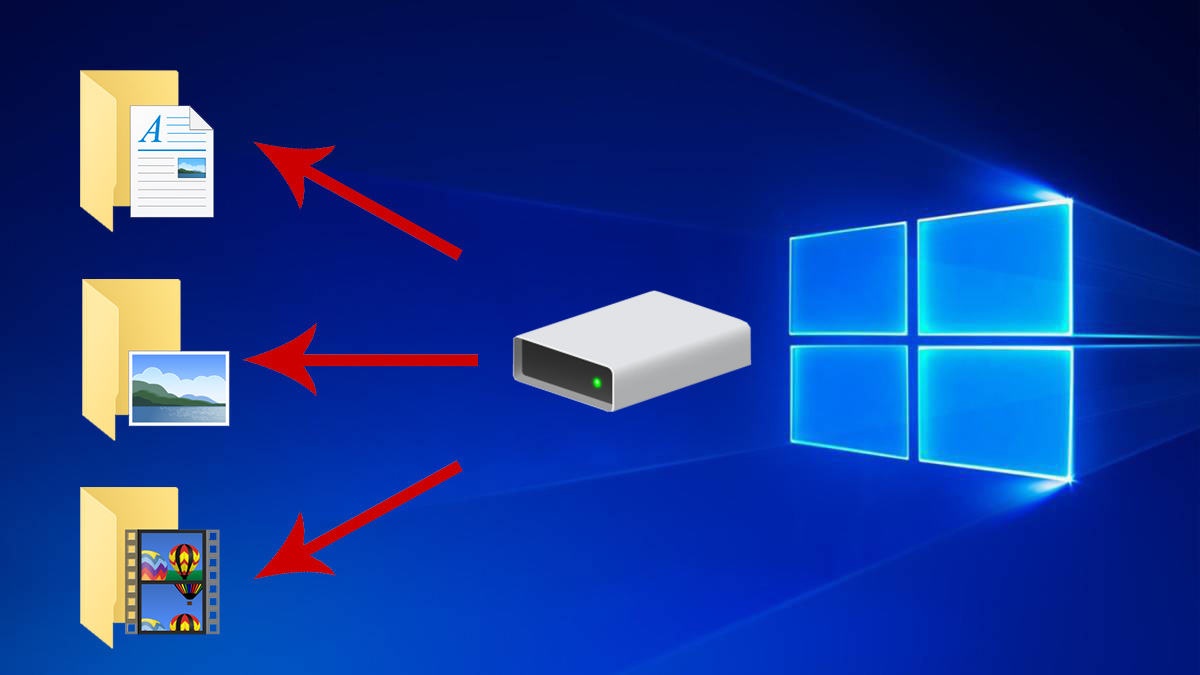
Windows 10 offers us a tool to do backup copies of the most important thing on our team: the files, be it documents, images or videos. Although the solution that Windows 10 offers us is not the only one currently available on the market, it is the one that offers us the best features, in addition to being totally free and natively integrated into the system.
Another of the strengths that the Windows backup system offers us is that we can make incremental copies, that is, it is making new backup copies of our documents, which allows us to access previous versions of files or even recover files that were deleted a long time ago.

If the backup copies do not take up much space, we make them every day and the hard drive where we are making them is large enough, we can configure the backup system so that keep all copies up to a maximum of 2 years old. If we start to run out of space, the system itself will delete the oldest copies to make room for the new ones.
It also allows us to establish how often we want to make a backup copy of all our data: every 1 minute, every hour, every 12 hours, daily ... Once we are clear about all the benefits and virtues that the backup system offers us. Windows 10, below we show you the steps to follow to make a backup in Windows 10.
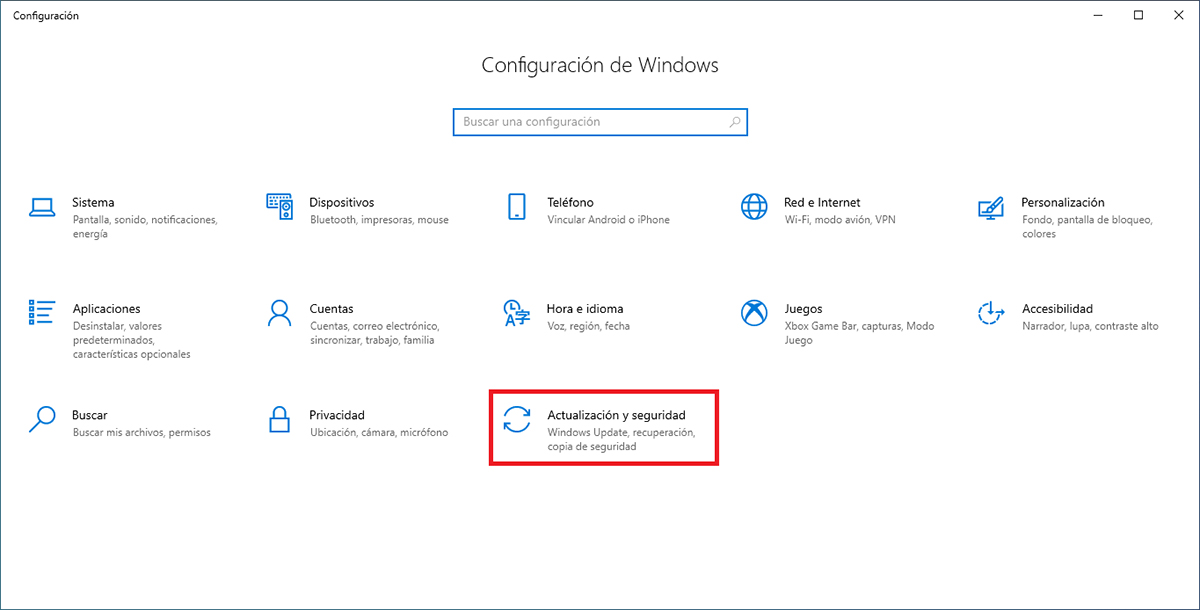
First of all, we must access the Windows 10 configuration options, through the keyboard shortcut Windows key + i and click on Update and security.
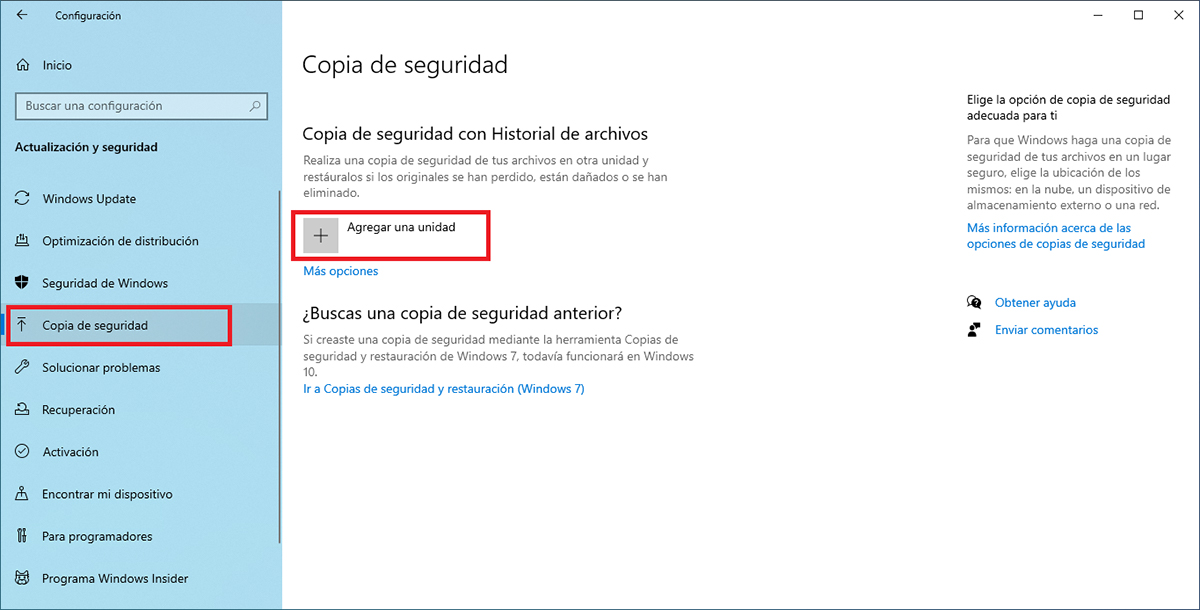
Within this section, in the left column, click on Backup. In the right column, click on Add a drive within the Backup with File History section.
Then a floating window will be displayed with all the units that we have connected to our equipment along with the total storage space. If we have only connected one unit, we must select the one that is shown.
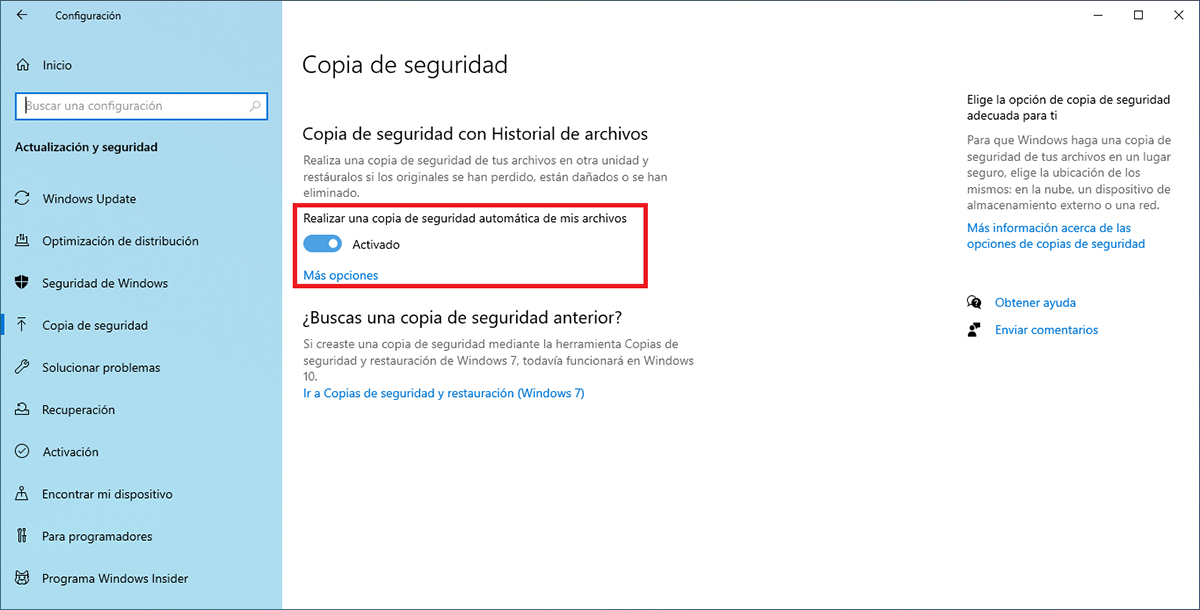
Once we select the unit where we are going to make the backup, the activated switch will be displayed Take an automatic backup of my files. To access the backup options, we must click on More options.
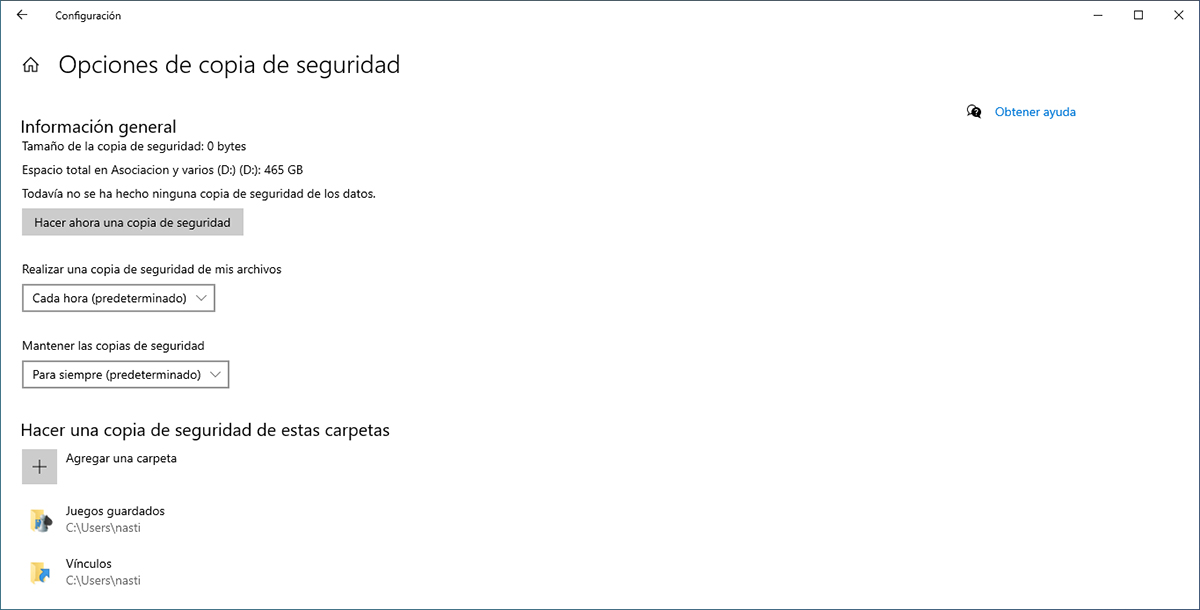
Below is a new window with 5 sections:
General Information
This section shows us the total size of current backup. At this moment, we are configuring the backup, so at the moment we have not made any and its total space is 0 GB. It also shows the total storage size of the external drive that we have connected to make the backup.
Within this section, within Back up my files, we can set the time that elapses between each of the backup copies made by the computer. In a native way, the backup is done every hour, but we can modify it for the following time frames:
- 10 minutes
- 15 minutes
- 20 minutes
- 30 minutes
- Every hour (default)
- Every 3 hours
- Every 6 hours
- Every 12 hours
- Daily
As I mentioned above, the Windows 10 backup system allows us to make incremental copies, that is, independent copies that only store the files that have been modified, so that we can access a history of the files that we have created , edited and deleted on our computer managed by Windows 10. In the section Maintain backups, we also have several options:
- Until space is needed
- 1 month
- 3 months
- 6 months
- 9 months
- 1 year
- 2 years
- Forever (default).
This last option is the most advisable if we want to keep a history of all the changes that a file has had over the years, however, it may be a bit exaggerated for ordinary users. Although this is the default option, home users, who do not plan to spend a large amount of money on an external hard drive, can select the option Until space is needed.
In this case, Windows 10 will erase the oldest backups to make room for the new ones. This process is automatic and the process of erasing the oldest copies is carried out only when space is short and we are scheduled to make a backup.
Make a backup of these folders
The next section shows us the default folders that Windows 10 will include in the backup. If any of the contemplated folders does not contain information that we want to keep, we can click on it and click on the Remove option.
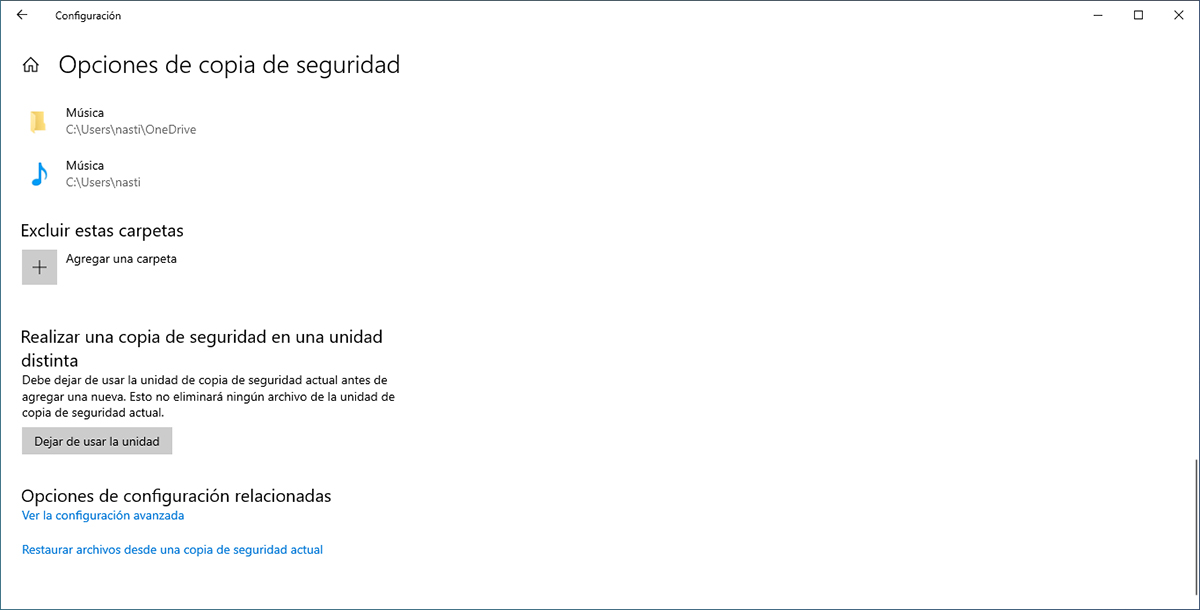
Exclude these folders
This section allows us exclude folders from backup that are inside other folders than if they are included in the backup copy. For example: By default the Desktop folder is included in the backup. If we have a folder on the desktop that we do not want to include in the copy, we must include it in this section.
Back up to a different drive
If the unit we initially selected has quickly become too small and we want to use a new one, we must access this section to Stop using the unit. When we stop using the drive that we used so far, we must start the backup process again from the beginning, establishing a drive to make the backup copies and select the folders that we want to include in it.
Related configuration options
The Related configuration options section allows us to access the advanced configuration, where we can see all the backups we have made or what is the same, the backup history. It also allows us to Restore files from a backup that we have previously made independently and not in batch.
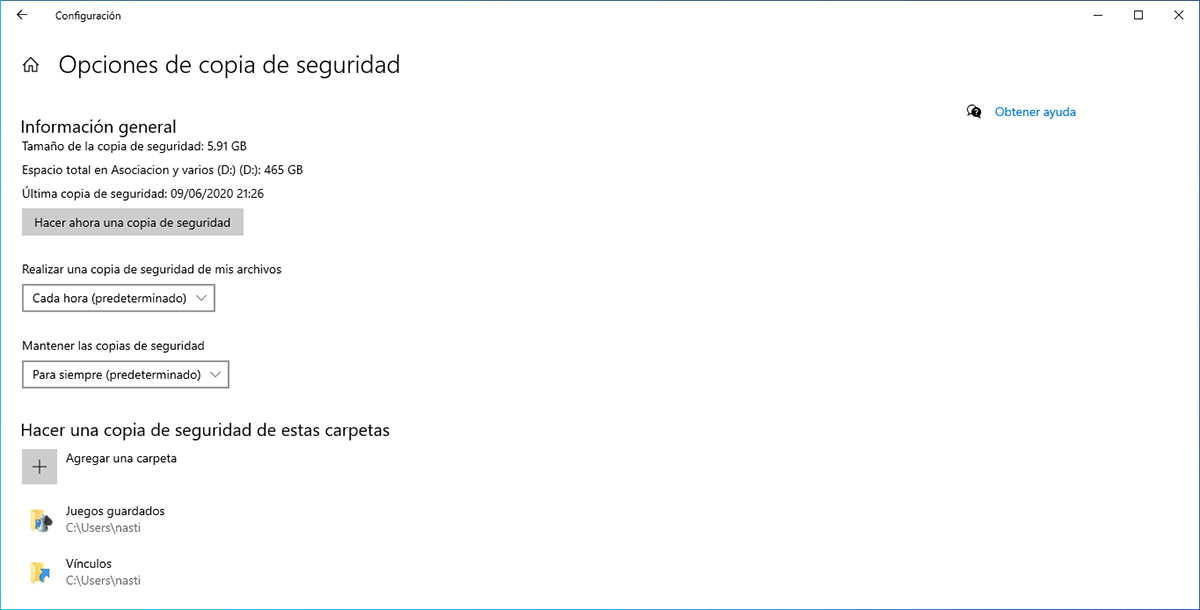
Once we have configured the operation of backup copies, with the folders that we want to include or exclude, the time established between the copies and the time they will be kept, we must create the first backup so that we begin to have all our data safe in case our hard drive, or the entire computer, stops working.
To start this process, we must click on Make a backup now. This process is carried out in the background with little effect on the system and will take more or less time depending on the total size of the files we want to copy.
How to restore a backup in Windows 10
Once we have configured our copy of Windows 10 to automatically take care of backup copies in the background, we must know how can we restore them.
The backup copies are stored in the unit that we have previously established within the FileHistory directory. Within this directory, we will find our backups within the directory of the username of the account of our team.
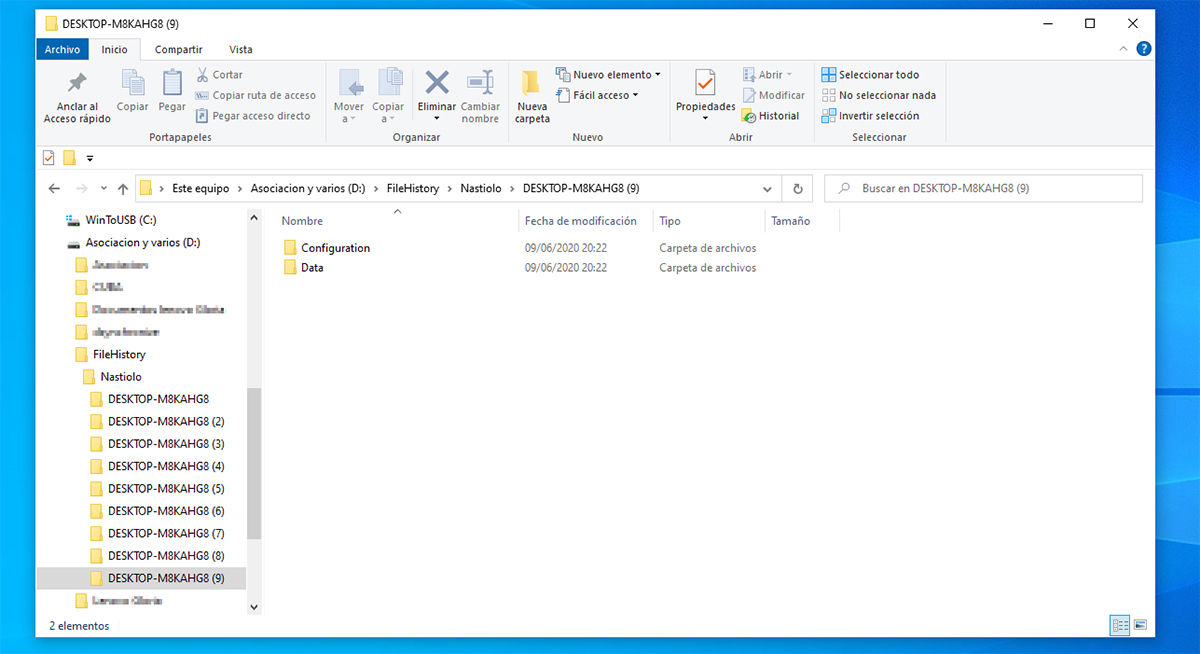
What does that mean? Windows 10 allows us to use the same external hard drive in all the equipment we want to make backup copies, performing them manually and not programmed unless we have connected the unit to our network, where all the computers can connect remotely and use the same storage device to centralize the copies.
Within that directory, we will find several folders, all of them numbered, with the name of our team (not to be confused with username). Within these folders, we find all the files that are part of the backup (folder Data), which allows us to access them independently if we restore the copies from Windows 10.
Each time a backup is made, a new directory is created. If we have not created any document or edited any of the files that are in the directories that are part of the backup that we have previously established, that backup only it will contain a copy of the equipment configuration (binder Configuration), not the files, since it would be duplicating content (incremental copies).
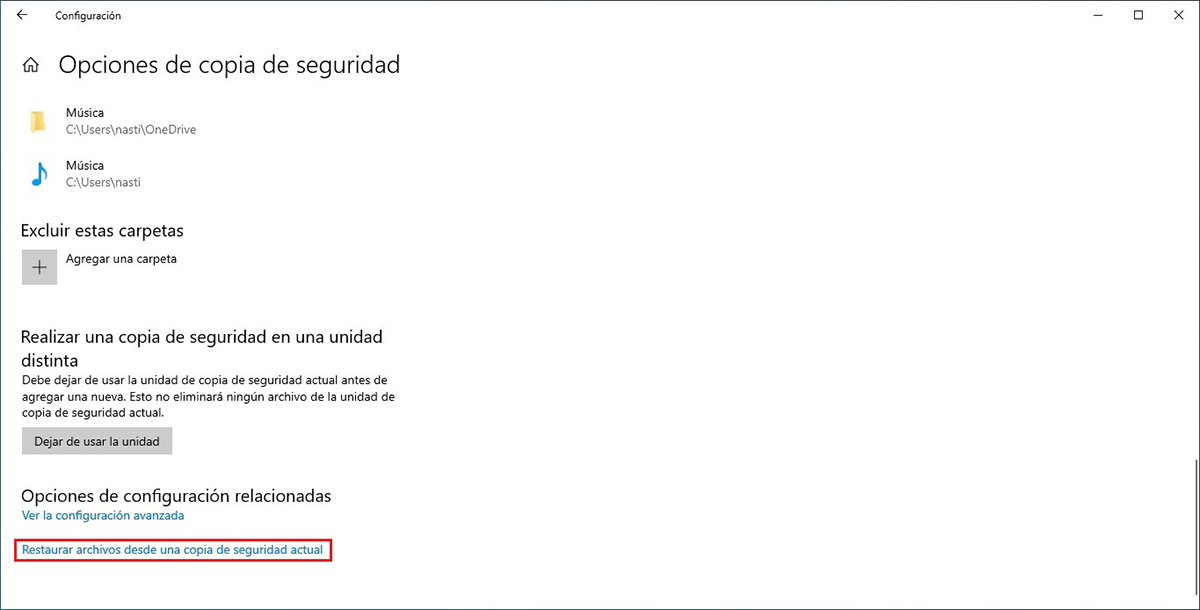
To access the backup system and be able to restore them, we must access the Windows 10 configuration (Windows key + i), Updates and backups, Backups and in the right column More options and Restore files from a current backup.
Restore a backup of all files
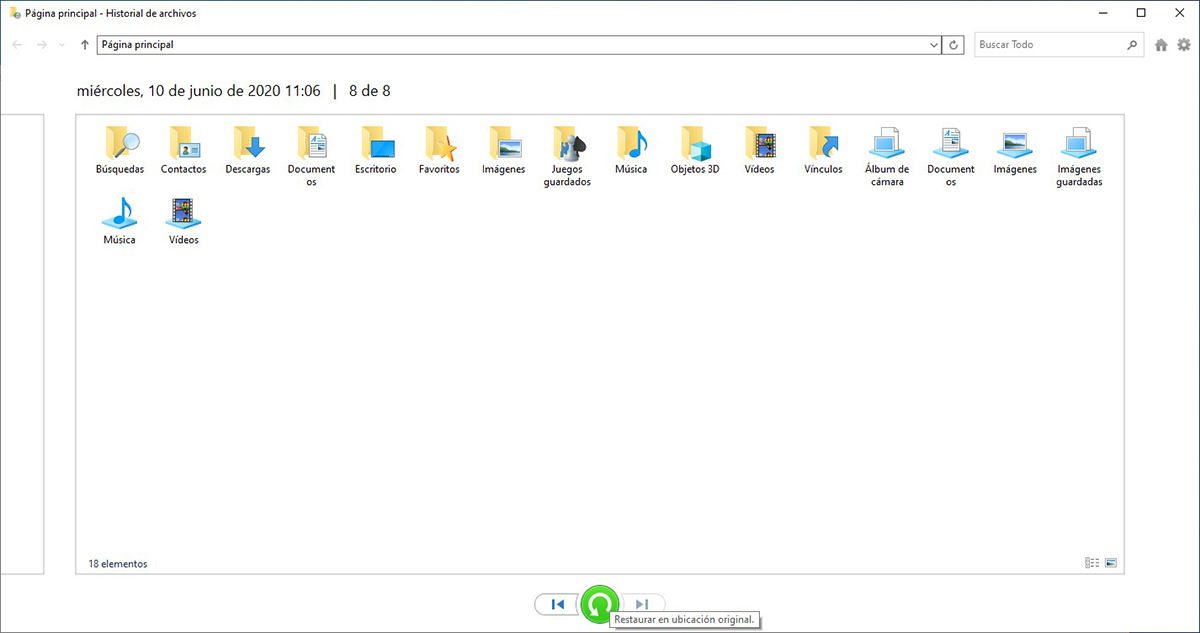
If we want to restore a backup copy of all the files that we have included in the backup, we just have to click on the two arrows located in the lower central part of the window, and select the last day that the backup has done your job and click on the green button called Restore to original location.
Restore a backup of selected files
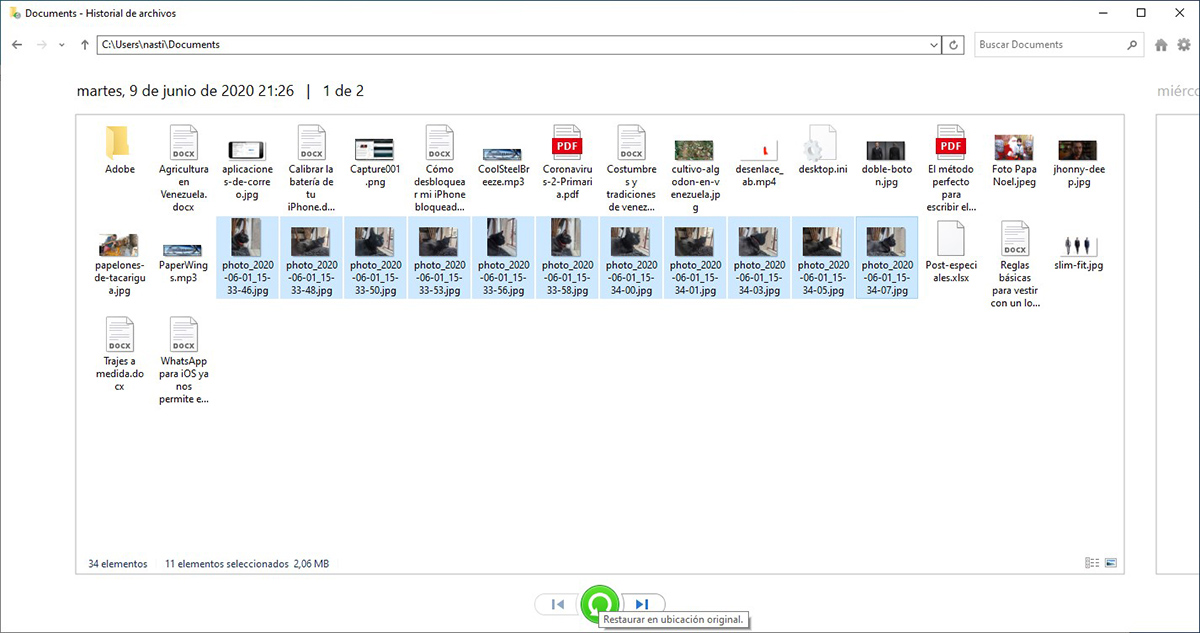
If we only want to restore a series of files, we must go to the directory where they are, select them and click on the green button Restore an original location.
Restore files to a different location than the original
In the first section of this section, I indicated that backups do nothing more than copy files as selected directories to external drive, classifying the copy by days and hours. Inside those folders are the original files.
If we want to restore the files to a different location, it is a complex process and it takes time, since it forces us to visit all the folders to check what are the latest versions of the files that have been copied.
This is one of the disadvantages of incremental copies, but at the same time it is their main virtue, since they are designed to reduce the space and time of the copies, although it forces us to use the same application with which we have created the copies to be able to restore the files.