
There are few tools more useful than screen capture, something that is undoubtedly very common on Smartphone when it comes to explaining what we are seeing with a single image. Well, in macOS it is just as simple as it is in any smartphone, a simple combination of keys on our keyboard will lead us to a capture among which there are several types. On Windows keyboards there is a print screen key that makes it even easier.
Doing this on macOS is by no means a difficult taskIt is just that if we spend a lot of time without using it, we can forget it, since a combination of keys is necessary to carry out the capture. There are several ways to make a screenshot in macOS and each one can serve us depending on the situation or need. In this article we are going to show what types there are and how to make them.
Capture types and what commands to use
The keyboard commands are the most instantaneous way to take screenshots, it is simple and if we take them regularly, we will not forget them, but it may happen that you forget if you spend a long time without using it. From a complete capture to the capture of a window or a specific area. These captures made will be saved on our desktop but there is also a command to copy it to our clipboard.
If you're looking for make a screen recording using a video, either for presentations or to record some kind of content, a while ago we made an article where we showed how to do it.
Full screen capture

- Method 1: we press the keys Shift + Command + 3 simultaneously and the capture of the entire screen will be saved on our desktop.
- Method 2: we press the keys Shift + Command + 3 + Control for save the capture to the clipboard.
If we have macos catalina When making this type of capture, a preview of the capture will appear in a corner in a small box. In this way we have quick access to some editing tools.
Capture only one area of the screen
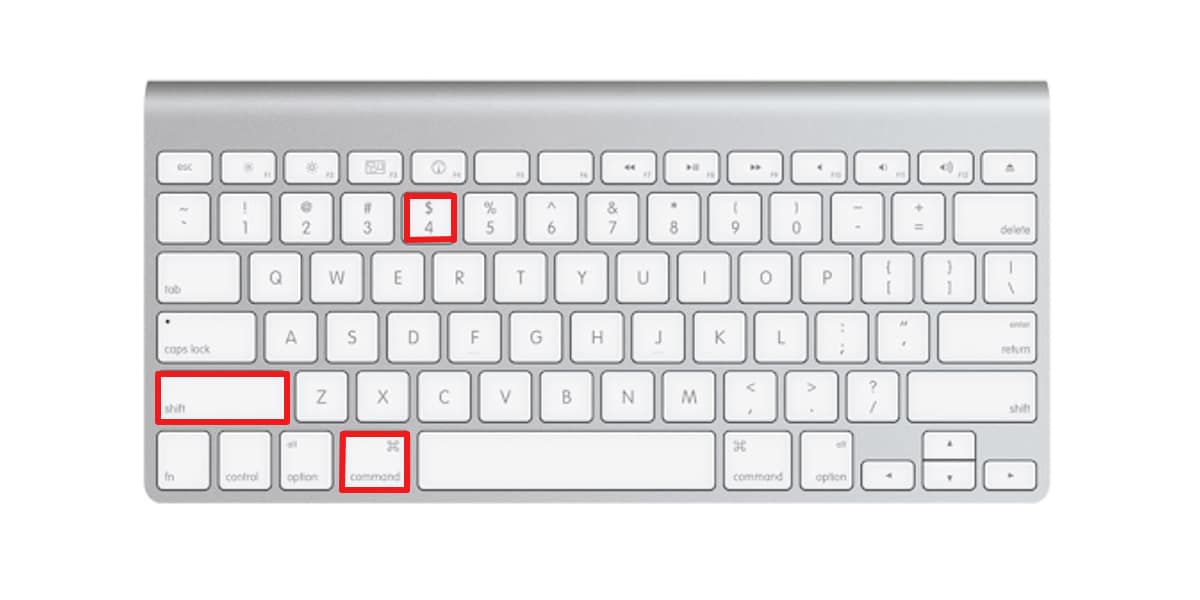
- Method 1: we simultaneously press the keys Shift + Command + 4. A cross will appear on the mouse pointer, use the pointer to select the area we want to capture, once you release the mouse click the capture will be saved on our desktop.
- Method 2: we press this time Shift + Command + 4 + Control. In this way, once we select the area, it will be saved on our clipboard.
Capture only one window

- We will first use the key combination, Shift + Command + 4 so that our pointer becomes a cross. If we want it to be saved to the clipboard we will also use the Control key at the key command.
- Now we press the space bar so that our pointer becomes a camera.
- Now all the windows over which we pass the pointer are will stand out in blue. This will indicate that those windows will be the ones that will be part of your screenshot.
This method in addition to saving windows can also save the desktop, menu bars or the Dock. The images will be saved in png format with a slight shading, if we do not want this shading, we keep option key while we click to save the image.
Use the on-screen marquee
If our version of macOS is Mojave or later, we can load a marquee on screen that you can move or resize. We have access to three capture tools, options to save, show the pointer, and more.
- We press the keys Shift + Command + 5 to choose what we want to capture, be it the full screen, a window or a specific box. The capture will be saved on the desktop. If we want to save it in the clipboard we will have to add the Control key to the key combination.
Capture editing
After making the capture we can edit it, we have many programs at our disposal for image editing, we are going to name 2 that are very important and have a wide range of tools.
Pixelmator
Pixelmator is a very powerful, beautiful and easy to use image editor. East program is exclusive to the Apple ecosystem. It is equipped with a wide range of editing tools, allowing us both edit our photos, how to create compositions, draw, paint or apply effects to our photographs.
This program can be downloaded from the Apple Store of macOS and has a cost of € 32,99It may seem expensive, but it is a lifetime license, so you only pay once and have a version that is constantly updated with many improvements. We can also find Pro version for € 43,99, it includes a few more options and a more professional interface.
PhotoScape X
A simple but effective image editor that allows us to process any image to improve it or correct any imperfection in a very simple way. Not even close to Pixelmator level, but it offers a number of functions that allow any user to handle them, even if he does not have knowledge about image editing and treatment.
The opinions about this editor are very positive and it is among the most valued in the Store, it is also totally free so its installation is almost mandatory if we do not want to spend anything.